


In this tutorial, I will show you How to Configure Form Builder Extension in Magento 2 using Magento 2 Form Builder of Landofcoder.
Magento 2 Form Builder is an essential extension which can help you create form builder with ease. It is a good way to gather huge important information from customers. It is needed to make the transaction possible.
Magento 2 Form Builder – Landofcoder
Before configuring Form builder, you should install this extension first.
Link guide to install Magento 2 Form Builder:
https://blog.landofcoder.com/install-magento-2-form-builder-sample-data/
After you successfully install the extension, let’s take a look at our tutorials below. It is time for us to set up Form Builder in your Magento 2 backend.
Firstly, it is highly suggested to run through setting before creating your first form. This will help you clearly understand how this extension works; simultaneously, you can make use of all set to create your blog post look and feel as your expectation.
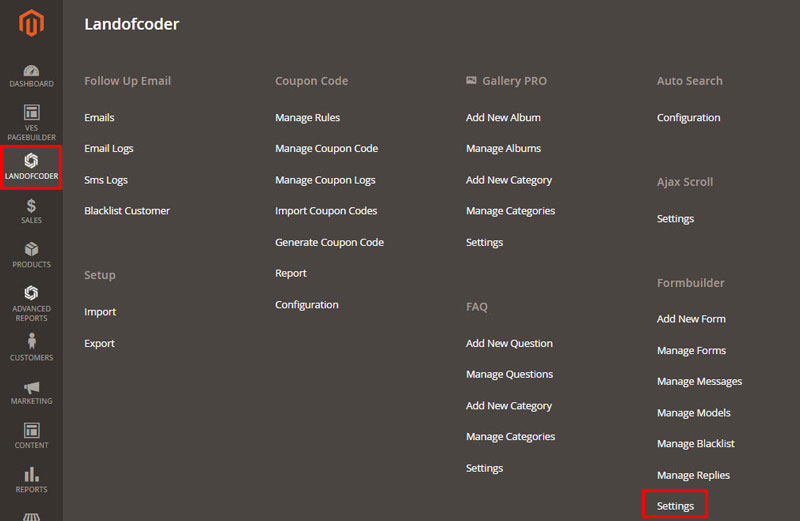
In order to config in the backend, please go to
Admin Panel > LandOfCoder > Form Builder > Setting
 There are 3 Tabs which need to Config Magento 2 Form Builder:
- General Setting
- Email Setting
- Field Templates
Table of Contents
I. General Setting
In general information setting, you should fill all information relate Route, Data Format, Google ReCaptcha, etc…
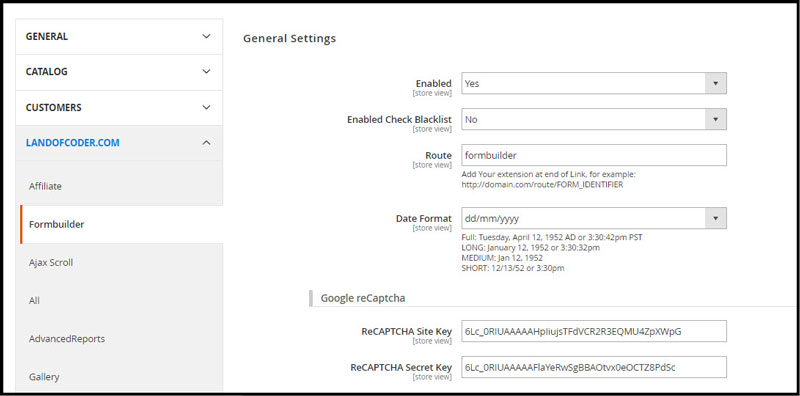
- Enable: Set yes to enable the extension
- Route: defines the direct link to the new form
- Date Format: choose one of 4 types to show date & time
Google reCaptcha
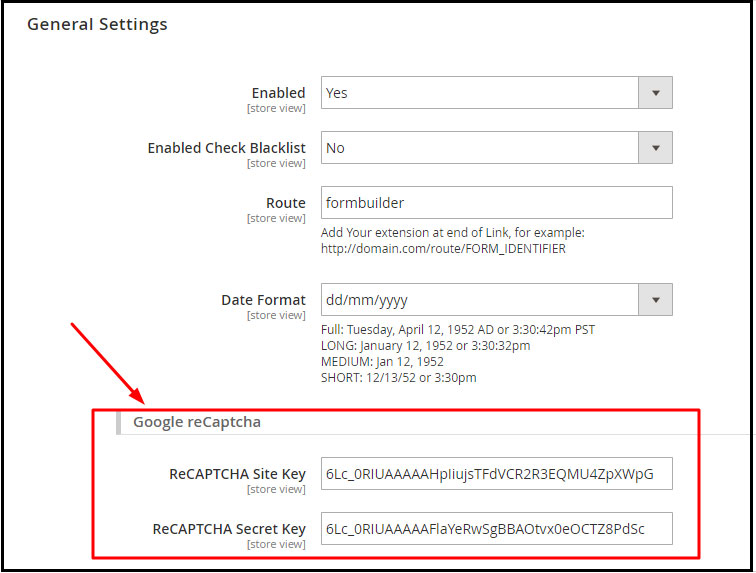
ReCAPTCHA Site Key: The ReCAPTCHA site key is used to display the widget on your site
ReCAPTCHA secret Key: The secret authorizes communication between your application backend and the reCAPTCHA server to verify the user’s response
II. Email Setting
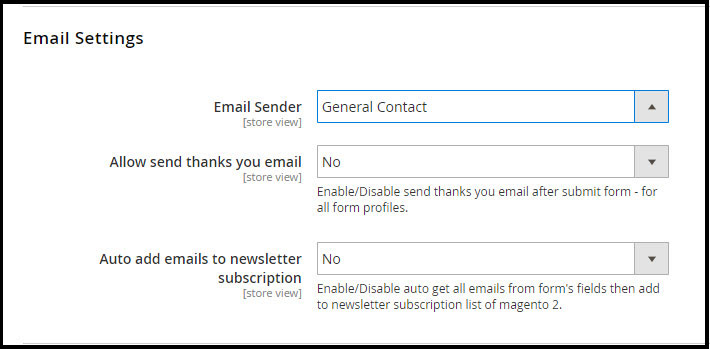
- Email Sender: Choose email sender address for your email
- Allow sending thank you email: Select Yes to send thank you email automatically
- Auto adds emails to newsletter subscription: Select Yesto auto get all emails from form’s fields then add to newsletter subscription list of Magento 2.
III. Field Templates
Address: This field is created by custom variables
(view detail: http://docs.magento.com/m1/ee/user_guide/cms/variables-custom.html)
Street: {{if street}}{{var street}}<br />{{/if}}
City Region: {{if city}}{{var city}}, {{/if}} {{if region}}{{var region}}, {{/if}}
Postcode: {{if postcode}}{{var postcode}}{{/if}}<br/>{{var country}}
After apply them, Front-end shows like this:

Google API: This Public Key is used to show location with google map on your form.
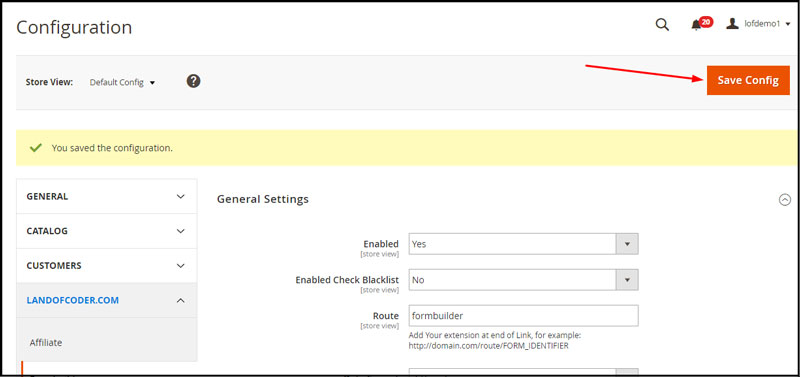
When you config all above information, you should click save configuration to ensure your content is saved successfully.
IV.Clear Cache
Then Clear Cache: System -> Cache Management -> Select All -> Submit
SOME OTHER EXTENSIONS YOU MAYBE INTERESTED IN
- Magento 2 Store Pickup
- Magento 2 Social Login
- Magento 2 Store LocatorÂ
- Magento 2 Follow Up Email
- Magento 2 Advanced Reports
- Magento 2 Affiliate Extension
- Magento 2 FAQ Extension
- Magento 2 SMTP Extension
RELATED POSTS
- 4+ Best Magento 2 Out Of Stock Notification Extension Free & Premium
- 7+ Best Magento 2 Layered Navigation Extensions Free & Premium
- 5+ Best Magento 2 SMTP Extensions Free & Premium
- 5+ Best Magento 2 Testimonials Extensions Free & Premium
- 10+ Best Magento 2 Marketplace Themes
- Top 10+ Best Magento 2 Multi Vendor Extensions | Powerful Marketplace Modules
- Top 10 Magento 2 Multistore Themes
- 10+ Magento 2 Advanced Report Extensions
- 10+ Best Magento 2 Store Locator Extension Free & Premium
- 14+ Best Magento 2 Social Login Extension Free & Premium
- Top 9 Magento 2 Reward Points Extension Free & Premium
- 10+ Best Magento 2 Blog Extension Free & Premium
- 10+ Best Magento 2 FAQ Extension Free & Premium


