On November 28, 2018, Magento just released Magento version 2.3 with many new and significant functionality. It’s time for us to upgrade and improve our Magento to be a better one in minutes.
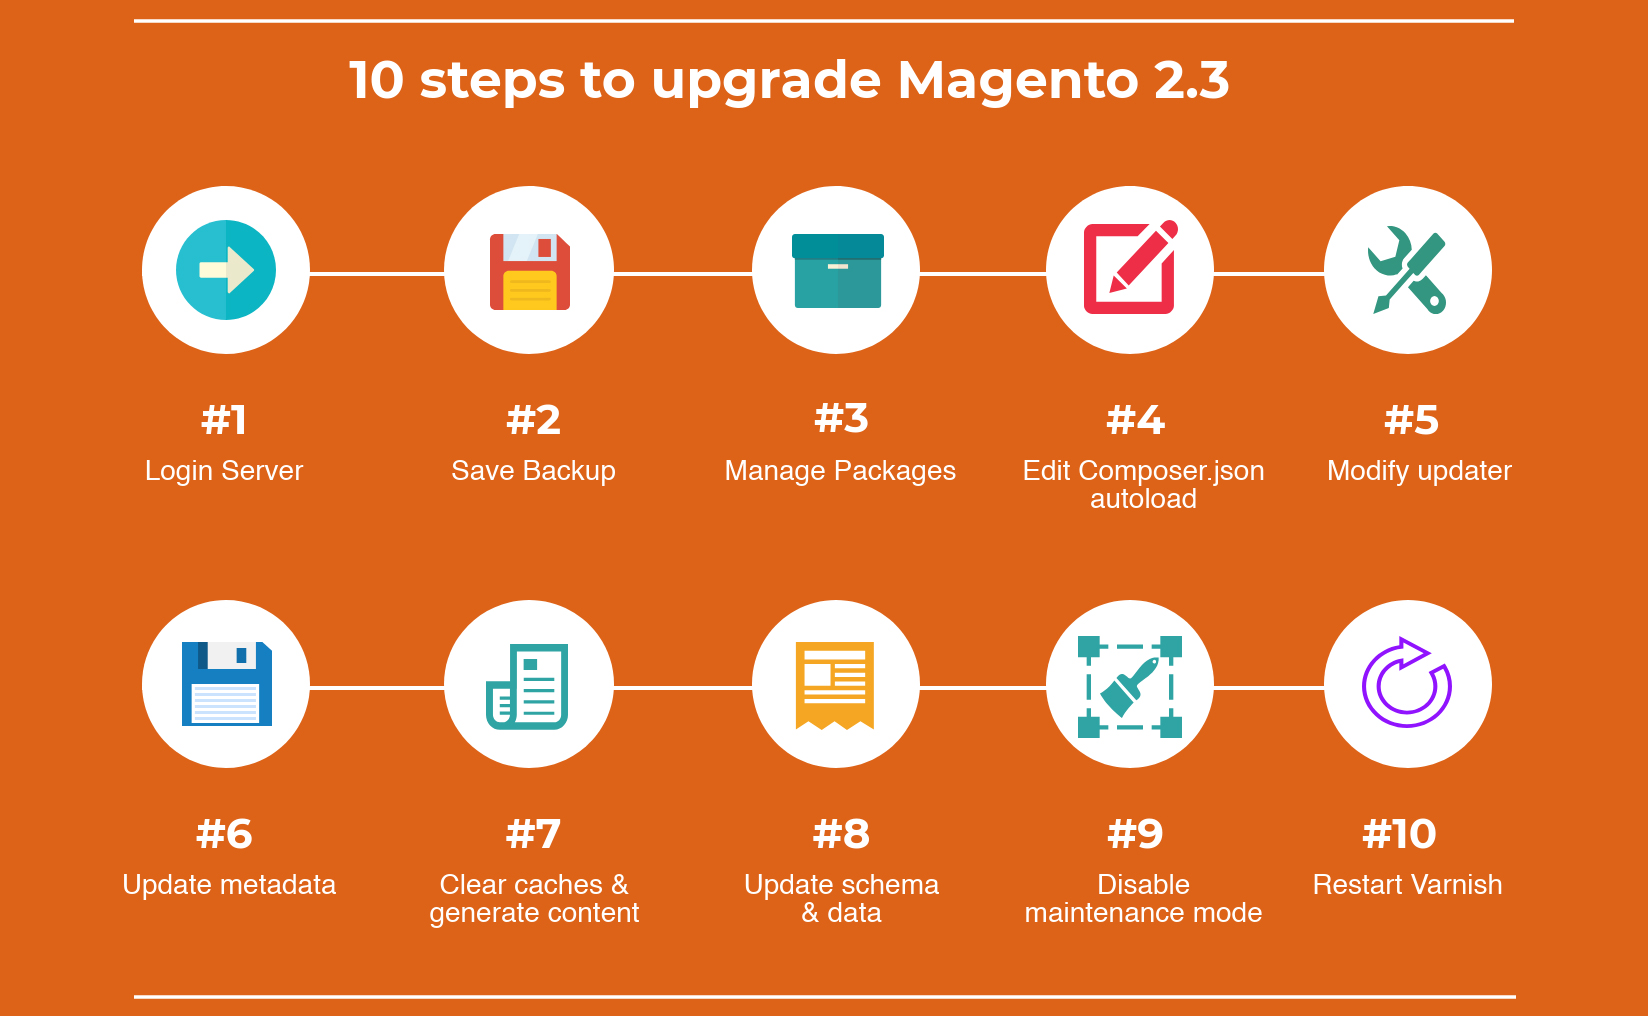
Today, in this tutorial, we will give you A to Z guide for you to upgrade Magento 2.3 from already existing Magento 2.2. With only 10 simple steps, you can successfully immigrate to Magento 2.3 and enjoy all its outstanding revolutions.
** Note: Upgrading to Magento 2.3 is a little bit tricky. Ensure that all your third-party extensions are compatible with the latest version of Magento 2.3. You can download & update it for the same. Don’t forget to take a backup before doing any updates!
Upgrade Magento 2.3 with Command-line upgrade

Table of Contents
Step 1: Login server
Log into your Magento Server or switch to the Magento file system
Step 2: Save backup composer.json
Backup the existing composer.json file in the Magento installation directory
Step 3: Manage Packages
1. Remove any unnecessary packages:
$ composer remove --dev sjparkinson/static-review fabpot/php-cs-fixer --no-update
2. Deactivate the Magento Open Source Update (optional):Â
(For upgrading from Magento Open Source to Magento Commerce)$ composer remove magento/product-community-edition --no-update
3. Specify Magento 2.3 packages
– For Magento 2 Open Source:$ composer require magento/product-community-edition=2.3.0 --no-update
– For Magento Commerce:$ composer require magento/product-enterprise-edition=2.3.0 --no-update
4. Specify addition packages
$ composer require --dev phpunit/phpunit:~6.2.0 friendsofphp/php-cs-fixer:~2.10.1 lusitanian/oauth:~0.8.10 pdepend/pdepend:2.5.2 sebastian/phpcpd:~3.0.0 squizlabs/php_codesniffer:3.2.2 --no-update
5. Remove unused packages
composer remove --dev sjparkinson/static-review fabpot/php-cs-fixer --no-update
Step 4: Edit Composer.json autoload
Open composer.json and edit the “autoload”: “psr-4” section to include “Zend\\Mvc\\Controller\\”: “setup/src/Zend/Mvc/Controller/”:
"autoload":
 "psr-4": {
 "Magento\\Framework\\": "lib/internal/Magento/Framework/",
 "Magento\\Setup\\": "setup/src/Magento/Setup/",
 "Magento\\": "app/code/Magento/",
 "Zend\\Mvc\\Controller\\": "setup/src/Zend/Mvc/Controller/"
 },
 ...
 }
Step 5: Modify the Magento updater
=> Backup and remove the old updater
=> Create a Composer project
– For Magento Open Source version 2.3$ composer create-project --repository=https://repo.magento.com magento/project-community-edition=2.3.0 temp_dir --no-install
– For Magento Commerce version 2.3$ composer create-project --repository=https://repo.magento.com magento/project-enterprise-edition=2.3.0 temp_dir --no-install
=> Move the new project$ mkdir update$ mv temp_dir/update <Magento install dir>/update$ rm -rf temp_dir
Step 6: Update metadata
=> Update “name”, “version” and “description” fields in <Magento install dir>/composer.json file
=> Apply updates:$ composer update
Step 7: Clear caches & generate content
=> Clear caches$ bin/magento cache:clean
=> Generate content:$ rm -rf <Magento install dir>/var/cache/*$ rm -rf <Magento install dir>/var/page_cache/*$ rm -rf <Magento install dir>/generated/code/*
Step 8: Update the database schema & data
$ php bin/magento setup:upgrade
Step 9: Disable maintenance mode
$ php bin/magento maintenance:disable
Step 10: Restart Varnish
$ service varnish restart

That’s all for this tutorial. Hope that you can upgrade your Magento 2.3 easily with our guide. If you have any problem while upgrading Magento, feel free to contact us.
OTHER EXTENSIONS YOU MAYBE INTERESTED IN
- Magento 2 Multi Vendor Marketplace Pro
- Magento 2 SMTP Extension
- Magento 2 One Step Checkout CE Pro
- Magento 2 Hide Price
- Magento 2 Advanced Report
- Magento 2 Out of Stock Notification
- Magento 2 Image Gallery Pro
- Magento 2 Auction Extension
- Magento 2 Customer Quotation
- Magento 2 Marketplace Extension
- Magento 2 Marketplace Reward Point
- Magento 2 Affiliate Pro
- Magento 2 Store Pickup
- Magento 2 Mega Menu Pro
Related Posts
- How to use Magento 2.3 PWA Studio effectively
- 20+ Best Magento 2.3 Extensions for eCommerce in 2018 | Free & Premium
- 20+ Best Magento 2.3 Themes | Free & Premium
- Top 15+ Premium Magento 2.3 Bootstrap Themes Boosting Your Productivity
- 54+ Best Magento 2 Themes- Fastest and Super Responsive Templates (Magento 2.3 Updated)
- 57+ Best Free Magento 2 Extensions: Fast, Functional and Easy To Use (Magento 2.3 Updated)
- 10+ Best Magento 2 Free Themes (Magento 2.3 Updated)
- 50+ New Best Magento 2 Extensions Free & Premium | Fast & Easy To Use (Magento 2.3 Updated)


![[SALE OFF] Discount 30% All Premium Extensions On Christmas And New Year 2025 christmas-and-new-year-2025](https://landofcoder.b-cdn.net/wp-content/uploads/2024/12/christmas-and-new-year-2025-1-218x150.png)


