


Generally, you’d want to make modifications directly on the PWA studio project, however, this technique is far from optimal if you want to construct extensions. You should be able to simply deactivate extensions or import numerous extensions into a project.
To do this, we may create a package within the newly established project and import it from the JSON file.
Today’s topic will show you a step-by-step process of create Magento PWA studio extensions.
Table of Contents
I. Steps to Create Magento PWA Studio Extensions
Step 1:
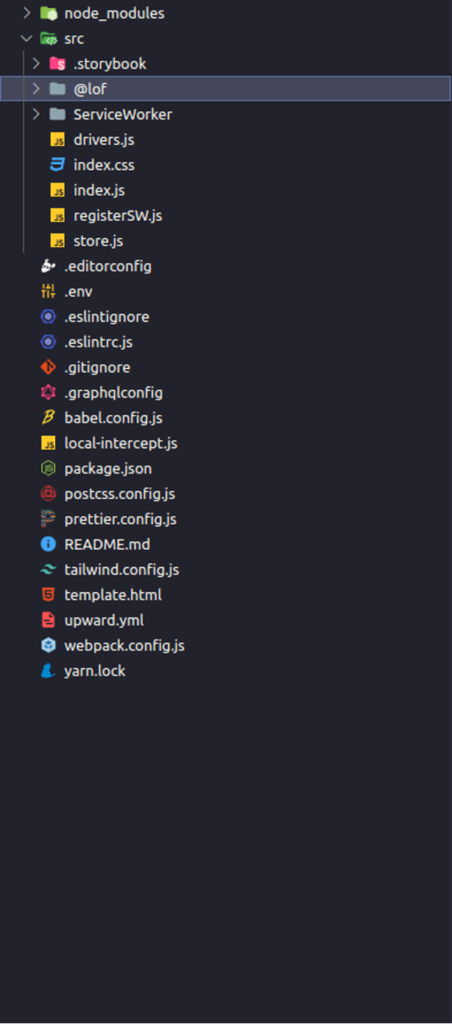
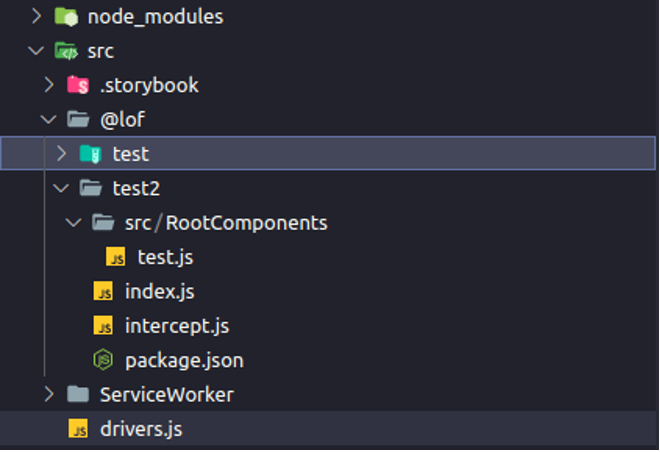
In the src folder, create the “@lof” folder. This file will include the custom extensions.
Step 2:
In the @lof folder, create a “test” extension.
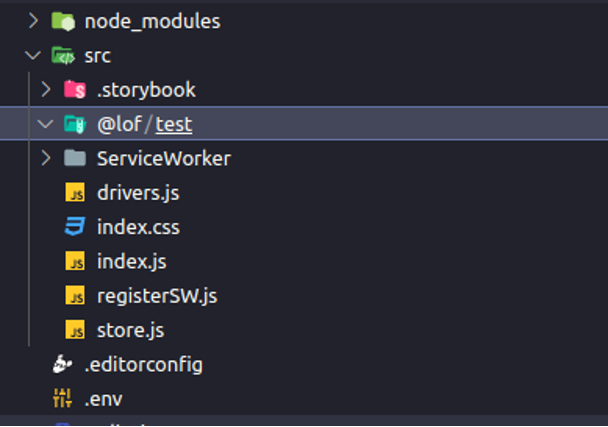
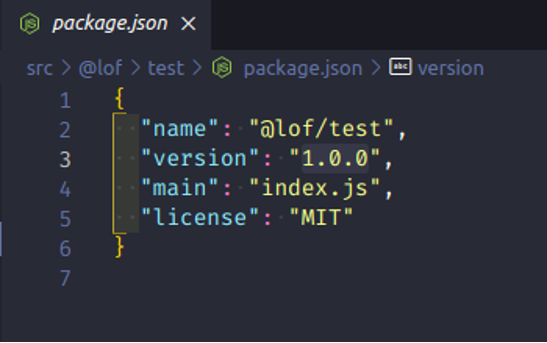
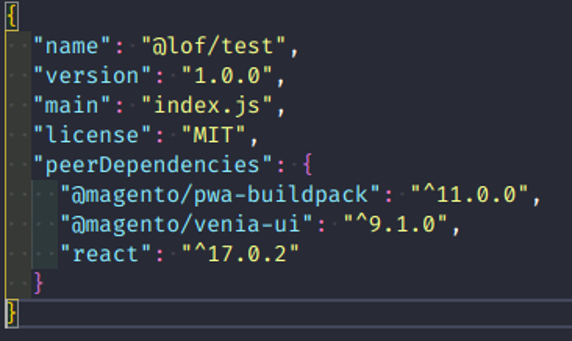
Point terminal to this directory and run yarn init command to configure name (for example, @lof/test), version (1.0.0 as a default), description (can be added if desired), entry point (index.js as a default), repository URL (can be added if desired), author (can be added if desired), license (MIT) (MIT as a default), private (can be added if desired).
We can now see that the package.json file has been created.
In the test folder, create intercept.js, and index.js files.
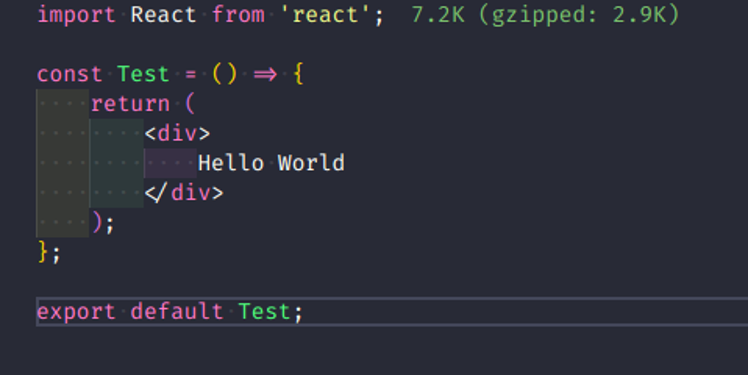
Continue to create src folder then create RootComponents folder and test.js file to create the component.
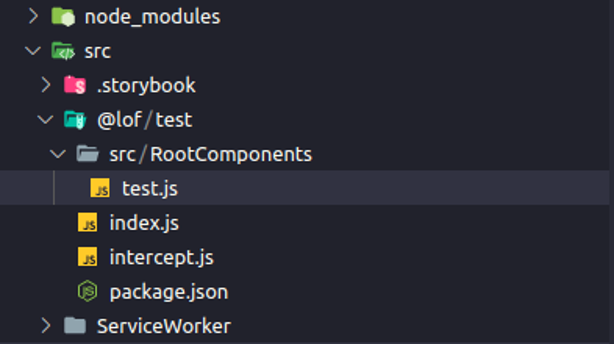
Create a component “Test”.
Step 3:
In the terminal, run the command:
yarn add –peer react @magento/venia-ui @magento/pwa-buildpack
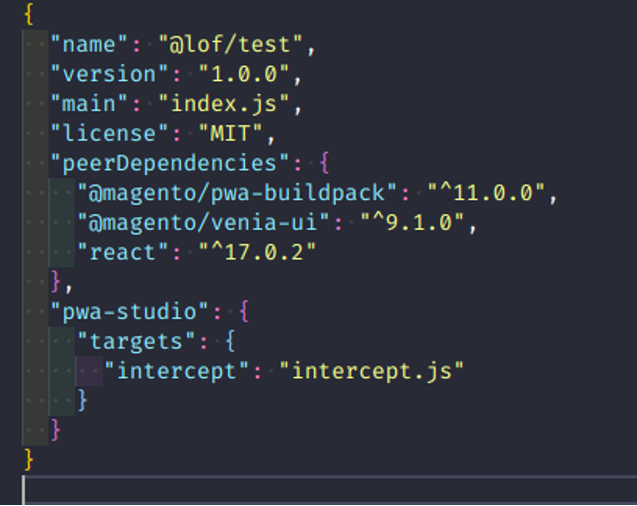
After creating, package.json file will appear like this:
Then, config intercept for PWA studio.
Step 4:
Define the intercept.js file
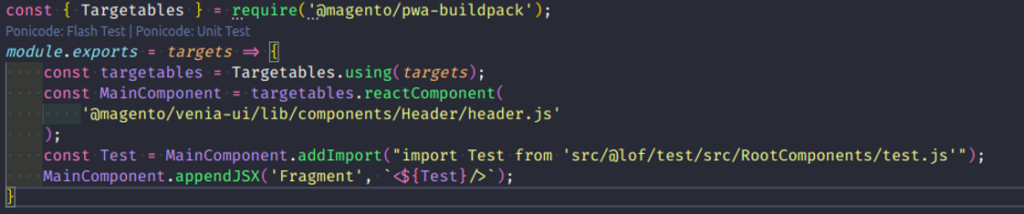
In this example, we will custom Header component:
- Target to react component: “@magento/venia-ui/lib/components/Header/header.js”
- Import component file into the file have targetable coming from addImport method and the test.js file address.
- Use the appendJSX method to append components to the component pointed above.
The first parameter will be the name tag and it will rely on this to apply the position of the component. For example, using the appendJSX method will help add components inside the Fragment tag of the component that pointed. know the tags of components are pointing to, look in the node_modules folder and then follow the path pointed to above.
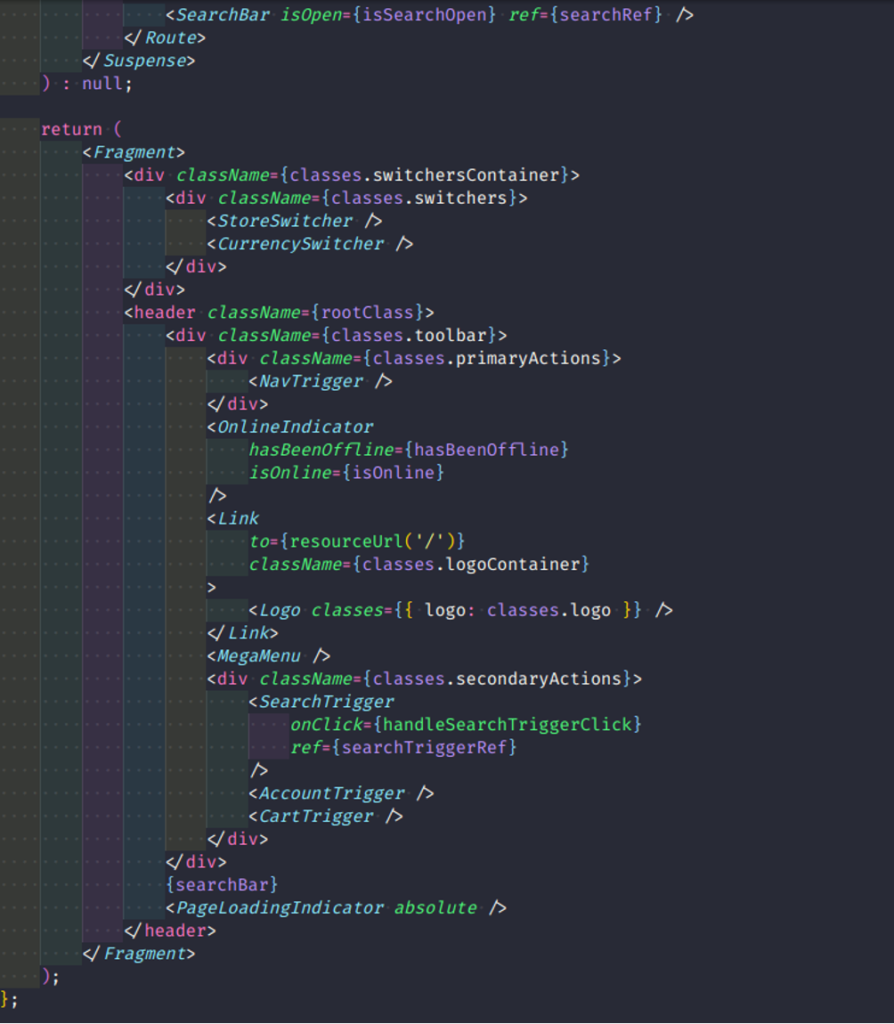
In conclusion, method appendJSX will receive 2 parameters: the first one is an element and it must match the jsx components that exist in the file you point to, the second one is a new element to insert and it must be written as a string. This method will put the element in the 2nd parameter as a child of the element of the 1st parameter (last child).
There are also some other methods such as:
- InsertAfterJSX
(“<Footer/>”, `<${Button} type=”button” priority=”high”>insertAfterJSX succeeded!</${Button}>` )
It also takes 2 parameters like appendJSX, this method will help us to add the element in the 2nd parameter after the element in the 1st argument.
- InsertBeforeJSX
(‘Footer aria-role=”footer”‘, “<span>Cumulative select worked</span>” )
It is similar to insertAfterJSX but the element in the 2nd parameter will be added before the element in the 1st parameter.
- addJSXClassName
(“Header”, ‘”anotherClass”‘)
It takes 2 parameters, the first parameter is the element that matches the JSX components that exist in the file we point to. The 2nd parameter is the class name, this method will help to add the class name in the 2nd parameter to the 1st element.
- prependJSX
It’s the same as appendJSX but it will be the first child.
- removeJSX
This method takes an element parameter that must match the JSX components that exist in the file you point to. It will help delete this element.
- replaceJSX
(“span id={`${dot.path}`}”, “<span>replaceJSX worked</span>”)
It’s similar to appendJSX in that it takes two parameters, but this method will remove the element in parameter 1 and replace it with the element in the 2nd parameter.
- setJSXProps
(“Footer”, { “aria-role”: ‘”footer”‘, “data-set-jsx-props-succeeded”: true, })
This function takes two parameters, the first parameter will be the element that must match the JSX components that exist in the file you point to, the second parameter is an object whose keys are the name of the props and their values. This method will add props to the element in the 1st parameter.
- removeJSXProps
This method is similar to setJSXProps but it will remove props that match the key values defined in parameter 2.
- surroundJSX
Similar to appendJSX, this function takes 2 parameters, but it will take the 2nd element and wrap it outside the 1st element.
Step 5:
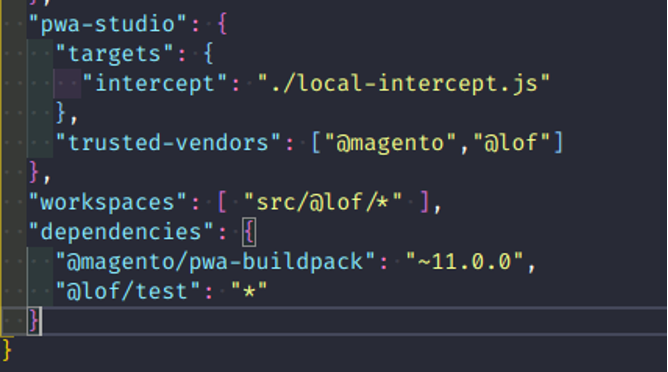
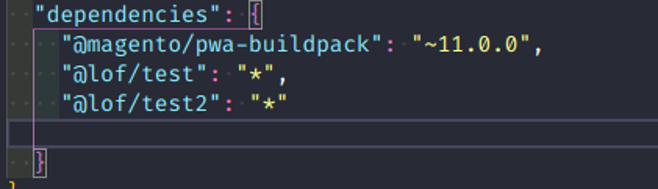
After define the intercept.js file, config package.json file at root project like below:
- “trusted-vendors”: [“@magento”,”@lof”]
- – “workspaces”: [ “src/@lof/*” ]
- – “dependencies”: {
- “@magento/pwa-buildpack”: “~11.0.0”,
- “@lof/test”: “*” (match with package.json name of extension)
},
** After editing package.json file, run the command “yarn install” to re-update
Step 6:
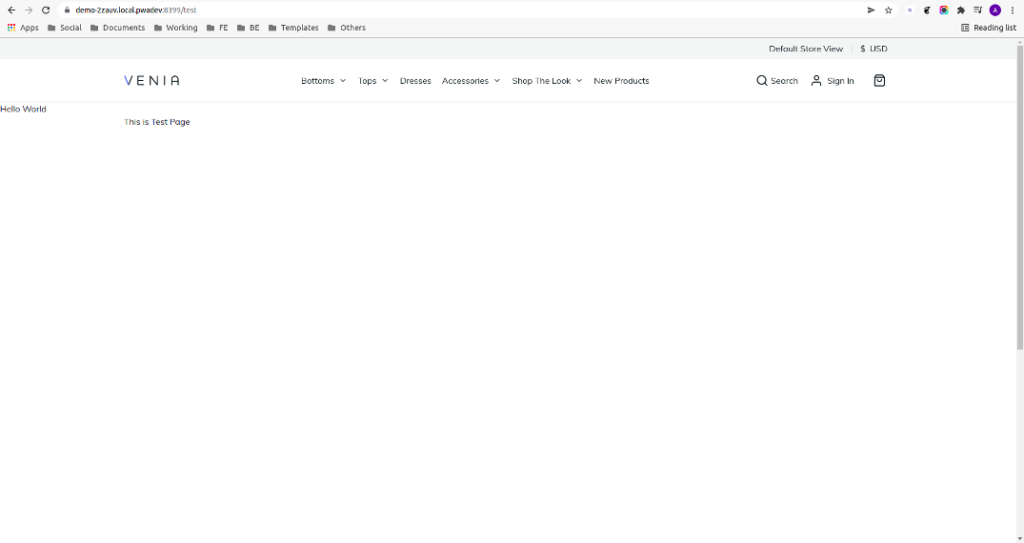
Point terminal to root project set it as a demo, and run yarn watch command.

The result will show “Hello World”

II. Steps to Create a New Route
Step 1:
Create a new folder that has the same structure and operations as the test folder above:
File “intercept.js” will have a different structure:
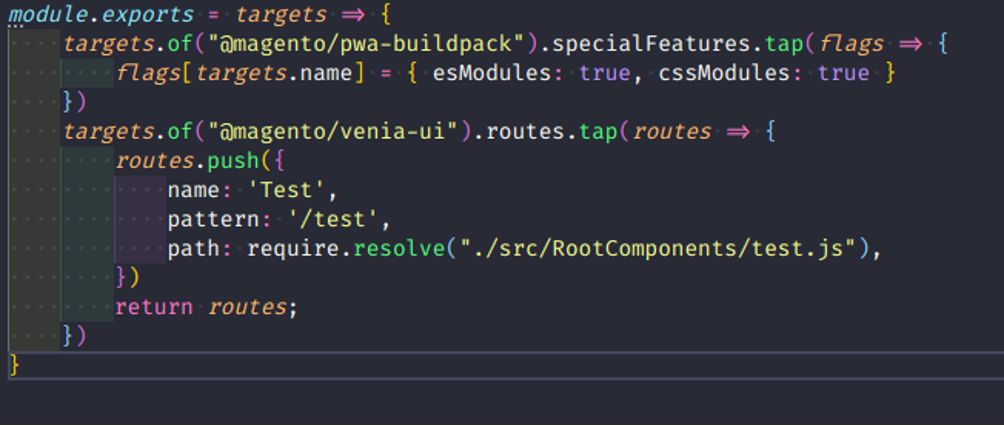
- Name: name the routes (each route will have a different name)
- Pattern: route path to show the path
- Path: put the path to the Test component to display the component
In the root project, put dependencies into package.json file.
Step 2:
Run the yarn install command then run the yarn watch for the result.
III. Conclusion
That brings us to the end of our tutorial. If you have any questions, please ask them in the comments section, and if you find this article useful, please rate it as such!
If you want to try out a Magento PWA Studio extension, we have free and open-source add-on modules that you can install on top of your Magento PWA Studio website.


