


For an online store, Language is one of the best way customers understand your message conveys, product and your store. And Magento Store, it supports for multiple Languages. Hence, setup language is not easy task and waste of time. Regarding giving you full Magento 2 Language package and translation tutorial, we hope you will have ultimate Magento 2 Language knowledge and are able to set up language for your store quickly.
For this presentation, our blog is divided:
– Overview Magento 2 language package and translation
– How to install Language Package
– How to change Magento 2 Language
– How to change Magento 2 Store Language
– How to create Magento 2 Multiple Languages
For example: Japanese Language Package
Let’s explore how it describes:
Table of Contents
1. Overview of Magento 2 Language Package and Translation:
What is the main function of Magento 2 Language Translation?
Magento 2 Language Translation enables you to localize your store for multiple regions and markets. The localization and customization of Magento instances are improved by making translation dictionaries easier to update and by maintaining a reduced amount of code coupling and duplication.
Remarkable changes in Magento 2
The magento 2 language packs can now be moved and saved to any directory of your extension.
The phrases for translations are enabled in the phrase class.
Benefits:
The Magento application automatically discovers the packages between module and theme ones included in the direction.
An entire dictionary in one directory used and distributed as a standalone component similar to modules and themes.
You can use the ready-to-use language packages prepared by other users or you can create your own.
You can create localizations based on existing, or parent, translations using language inheritance. Inheritance means (among other things) that if you missed or omitted localizing some phrases or terms, parent translations are used.
You can customize your translations even further by creating more than one version of a translation for the same language.
Based on your needs, you can use the existing language packages or translate Magento by yourself.
When do you need Magento 2 Language Translation?
You want to replace certain strings from the parent theme. For example, use “Compare†instead of “Add to Compareâ€.
You want your theme to be ready for localization.
Word and Phrase Translation:
If you want to translate names, titles and phrases using Magento, please follow the steps below:
Step 1: Generate a dictionary of your instance using the translation dictionary tool.
Step 2:Â Translate the terms.
Step 3: If desired, package your translations in a language package.
Some requirements are met in word and phrase translation.
The Magento code base has the necessary translation dictionaries for a language
This language is configured by the store administrator to be used in specified scope.
The Magento application automatically assembles translation dictionaries located in modules’ directory into a dictionary per language. For example, Brazilian Portuguese translation dictionaries might be located in module and theme directories similar to the following:
app/code/Magento/Checkout/i18n/pt_BR.csv
app/design/frontend/Magento/demo/i18n/pt_BR.csv
2. How to Install Language for store
Language packs can be found under “Translations & Localization” on Magento Marketplace. New extensions are continually added to Marketplace.
Step 1: Install a magento 2 language package
- Log in to the Admin of your Magento store as a user with full administrator rights.
- On the Admin sidebar, tap System. Then under Tools, choose Web Setup Wizard.
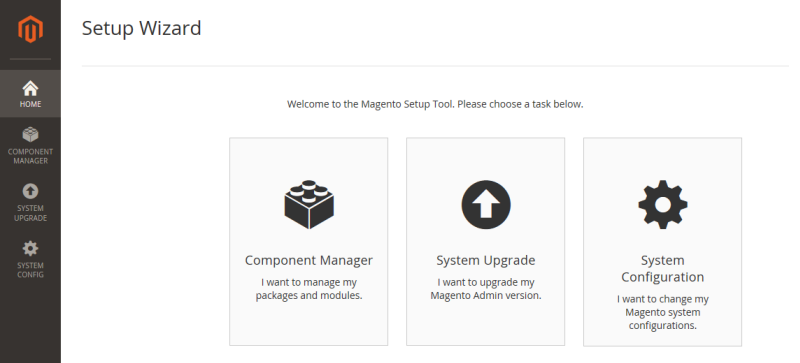
Web Setup Wizard
- Tap Component Manager and then click the Sign In link in the upper-right corner.
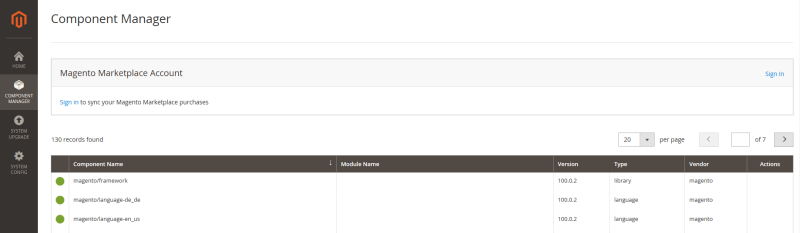
Component Manager
- Â When prompted, paste the Public Access Key and Private Access Key from your Marketplace account. Then, tap Sign In . To learn more, see Magento 2 Access Keys in the Marketplace User Guide.
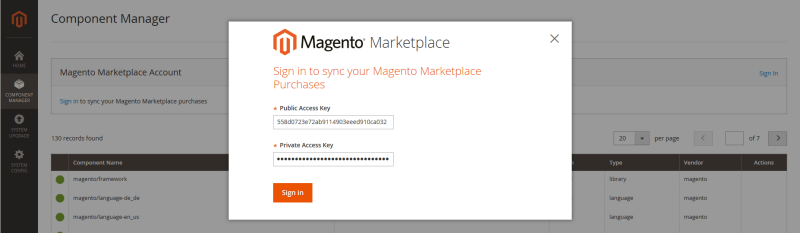
Paste Access Keys
- To synchronize Component Manager with your Marketplace purchases, tap Sync. It might take a few minutes. When the process is complete, the number of new purchases appears with the date and time the store was last synchronized.
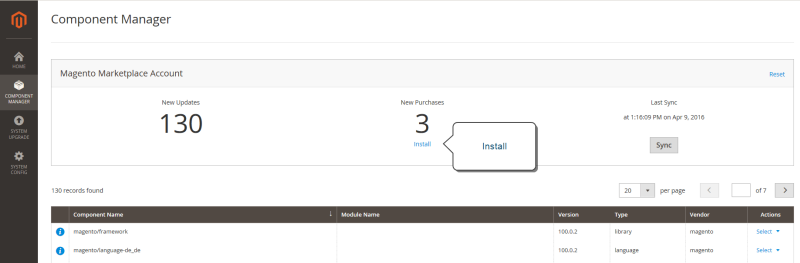
Component Manager
- In the Marketplace Purchases section under New Purchases, click Install.
- In the Extensions Grid, mark the checkbox of the extension you want to install. Then in the Action column, click the Install link for the item.
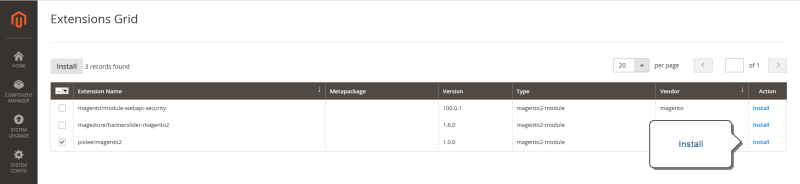
Extensions Grid
-  We’re almost done! Follow these steps to complete the installation:
–Readiness check:
+Before the installation begins, your store environment must be checked for compatibility. When ready to begin, tap Start Readiness Check. The progress indicator shows where you are in the process.
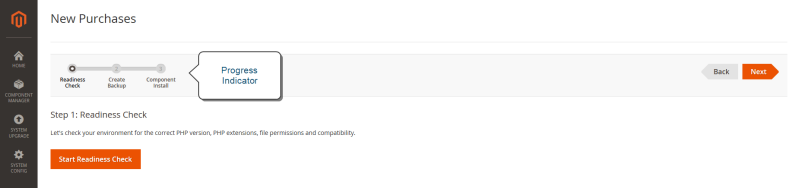
Readiness Check
+When the Readiness Check completes successfully, tap Next.
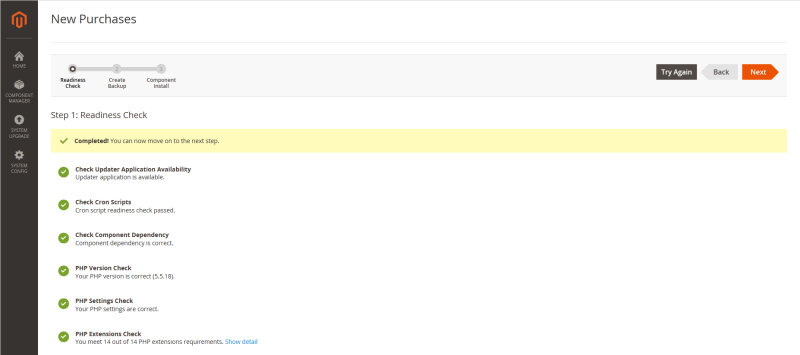
Readiness Check Complete
–Create Backup:
+ Your store will be put in maintenance mode while the backup is created. When you are ready to begin, tap Create Backup. Then, wait a few minutes for the backup to complete.
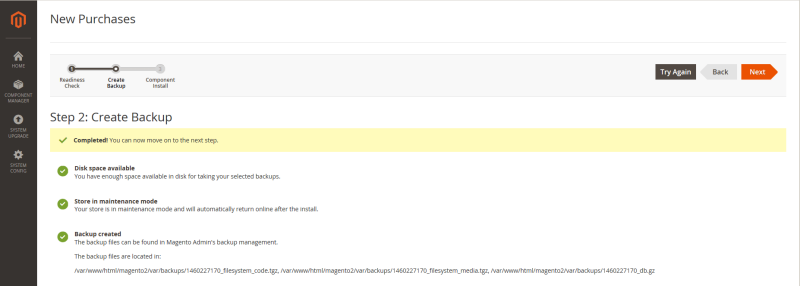
Backup Complete
+You can see the path to the backup file at the bottom of the report. When the backup is complete, tap Next.
–Component Install:
+ When you are ready to begin, tap Install. Then, wait a few moments for the installation to complete.
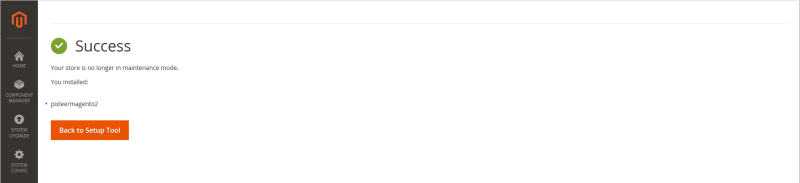
Installation Complete
+ When complete, tap Back to Setup Tool. Then, tap the System Configuration tile.
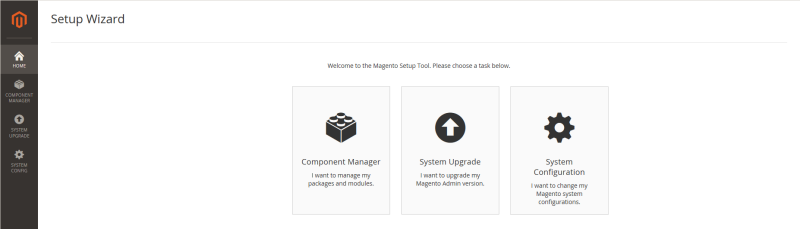
Setup Wizard
+In the upper-right corner of Component Manager, click the Reset link to log out.
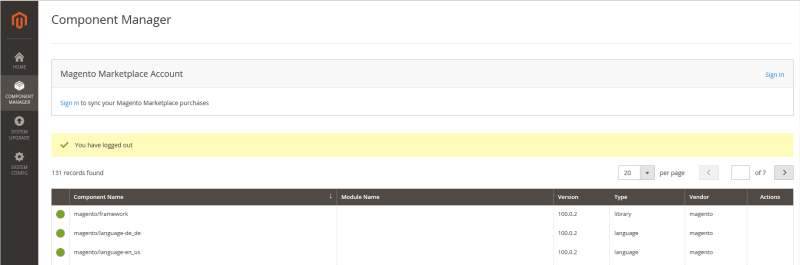
Logged Out
–Configure the Extension for your store:
+Log in to the Admin of your store.
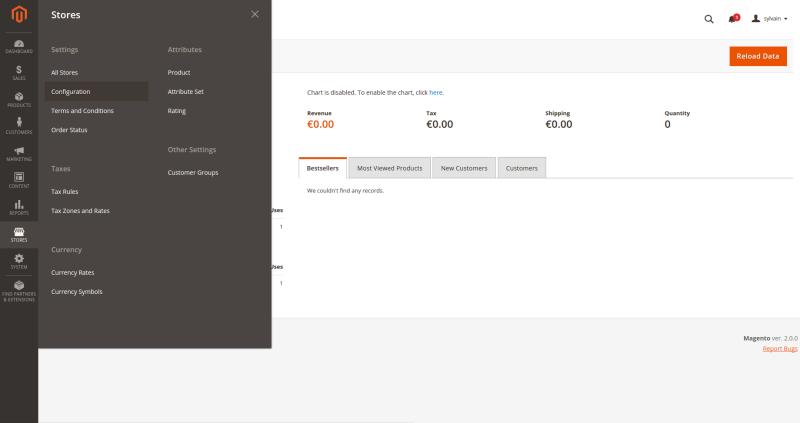
+ On the Admin sidebar, tap Stores. Then under Settings, choose Configuration.
+ In the panel on the left, find the new tab for the extension you installed. Then, follow the instructions from the extension developer to complete the configuration.
Step 2: Create a store view for the language
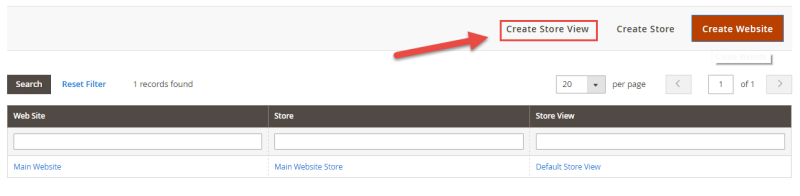
- On the Admin sidebar, tap Stores. Then under Settings, choose All Stores.
- Tap Create Store View. Then, do the following:
+ Choose the Store that is the parent of the view.
+Enter a Name for the store view. For example: Portuguese. In the header of the store, the name appears in the “language chooser.â€
+Enter a Code in lowercase characters to identify the view. For example: portuguese.
+To activate the view, set Status to “Enabled.â€
+ (Optional) Enter a Sort Order number to determine the sequence in which this view is listed with other views.
- When complete, tap Save Store View.
Step 3: Change the locale of the store view
- On the Admin sidebar, tap Stores. Then under Settings, choose Configuration.
- In the upper-left corner, set Store View to the specific view where the configuration is to apply. When prompted to confirm scope switching, tap OK.
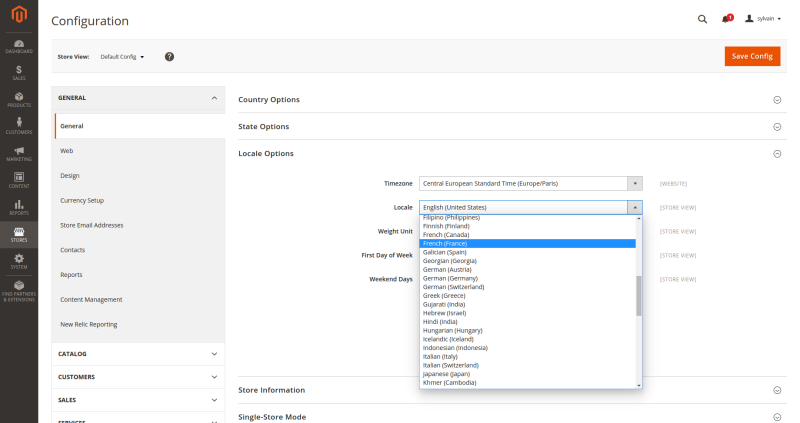
- Expand the Locale Options section.
- Clear the Use Website checkbox after the Locale field. Then, set Locale to the language that you want to assign to the view.
If there are several variations of the language available, make sure to choose the one for the specific region or dialect.Â
- Â When complete, tap Save Config.
3. Installing Magento 2 Language Package:
There are two dominant methods to install Magento 2 Language Pack.
- Composer install: Go to your Magento 2 path folder and open a terminal.
- Manually install:
–Download archive from GitHub
–Go to the Magento 2 path
–Create a folder app/i18n/imaginaerum/fr_fr into your Magento 2 path.
4. Configure Magento 2 Language Translation Setting
Step 1: Go to Stores > Configuration
Step 2:
–Open General > Locale options section.
–Choose French (France) into Locale.
–Save configuration
5. How to change Magento 2 Language Package Translation?
- Â In your Magento admin go to System > Manage Stores
- Â Â Click on Main Website Store under the Store Name (if there are several ones, click any of them)
- On the next page under Store Information select a different language in the Default Store View drop-down list.
- Â Click Save Store.
- Now every time you are opening the your site, it’s going to be in the language you selected.
- You can change the default language for the backend by going to System -> Configuration -> General -> Locale options.
6. How to change Magento 2 store language
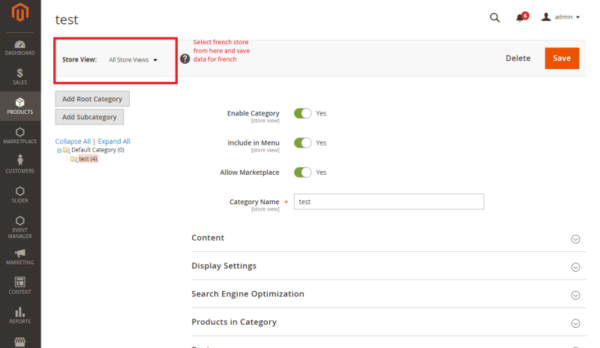
-Go to Admin->Products->Categories in left side above corner you will find Store View: select store and save data for particular store. Please show below image for reference
7. How to create Magento 2 multiple languages:
Step 1:Â Install a Language Pack
There are 3 different methods to install this language pack.
Method 1: Composer method
Install Japanese pack:
composer require mageplaza/magento-2-japanese-language-pack
php bin/magento setup:static-content:deploy ja_JP
php bin/magento cache:clean
php bin/magento cache:flush
Update Japanese pack:
composer update mageplaza/magento-2-japanese-language-pack
php bin/magento setup:static-content:deploy ja_JP
php bin/magento indexer:reindex
php bin/magento cache:clean
php bin/magento cache:flush
Authentication required (Optional)
 If you have not added this authentication, you can follow this guide:
–Go to Magento Marketplace.
–Click Sign In and enter your login credentials. If you don’t have a free account, click Create an Account.
–After you log in, click My Access Keys as the following figure shows.
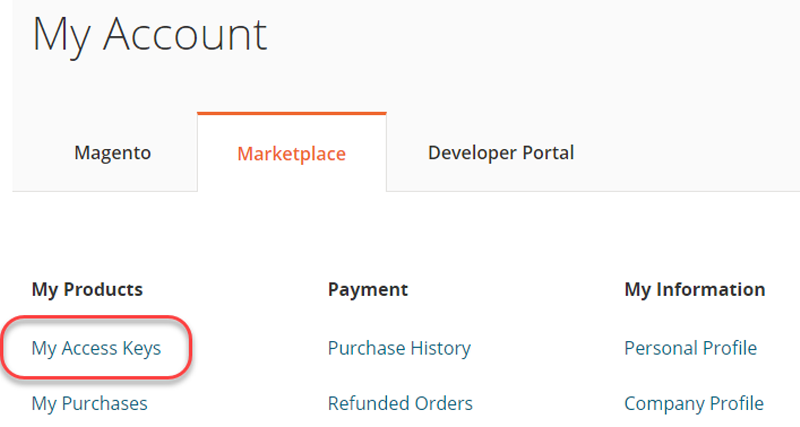
-If you already have keys, use the Public Key as your user name and the Private Key as your password.
-To create a new key pair, click Create a New Access Key.
-The following figure shows an example.
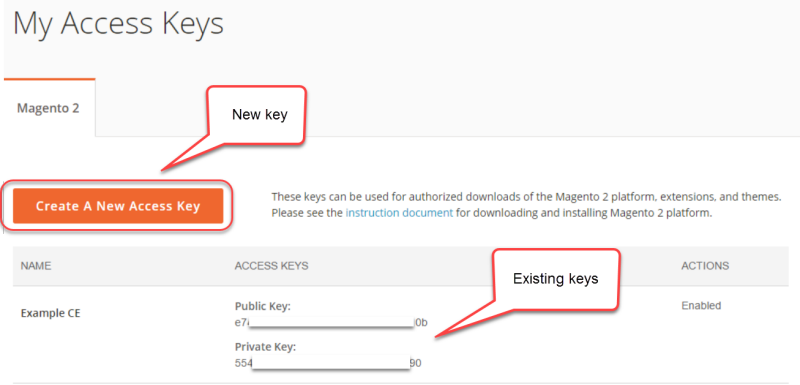
-When prompted, enter a descriptive name to identify the key pair.
-Click Generate New. Use the Public key as your user name and the Private key as your password.
Manage your authentication keys
You can optionally disable or delete authentication keys you created. For example, you can disable or delete keys for security reasons after someone left your organization.
·        To disable keys: Click Disable. You can do this if you want to suspend use of your keys.
·        To enable a previously disabled key: Click Enable.
·        To delete keys: Click Delete.
You cannot delete or disable keys you created by signing in to magento.com.
To manage those keys:
–Log in to your magento.com account.
–In the top navigation bar, click Connect.
–In the left pane, click Secure keys.
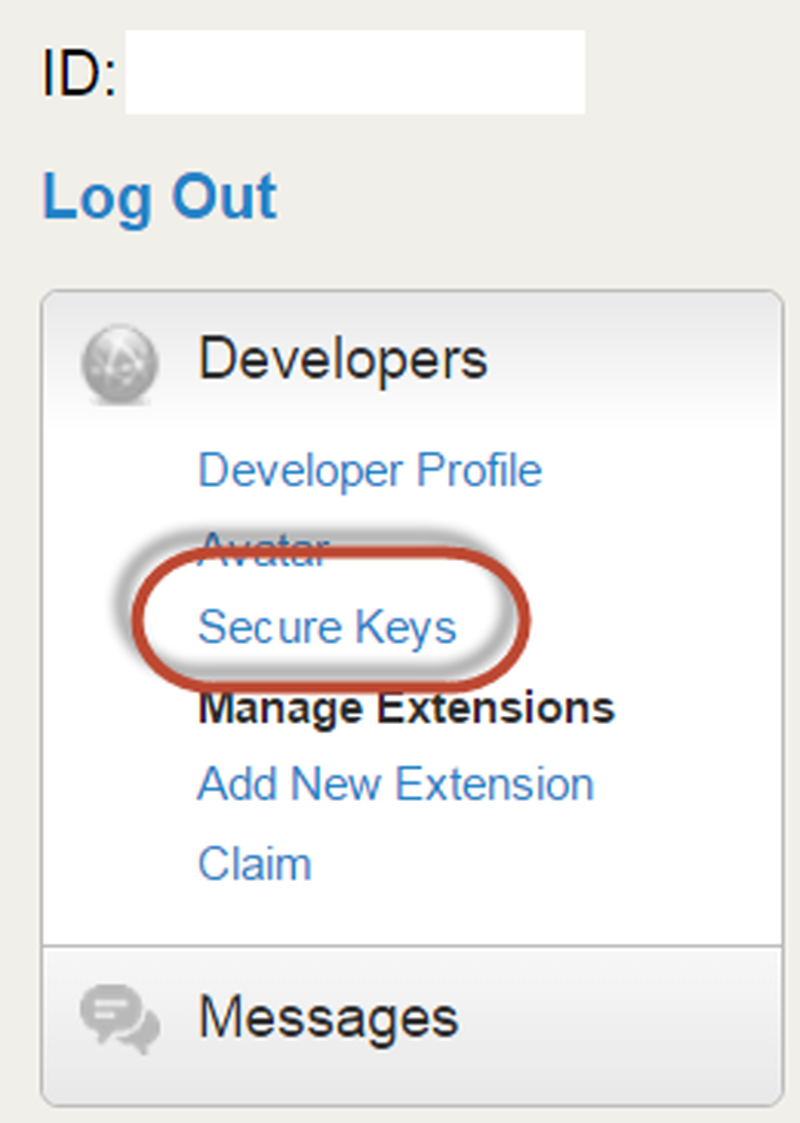
–Enable or disable the desired keys.
Method 2: Copy and Paste
This method suitable for non-technical people such as merchants. Just download the package then flush cache.
- Download the Japanese language pack
You can download the language pack from above link
- Unzip Japanese pack
Unzip the Japanese language pack to Magento 2 root folder. In this guide, we extract to /var/www/html/ Your Magento 2 root folder can be: /home/account_name/yourstore.com/public_html/
unzip fr.zip /var/www/html/
You also can unzip locally and upload them to Magento 2 root folder.
- Flush Magento 2 Cache
Follow this guide to Flush Cache on your Magento 2 store
Method 3: Download and install manually
To download and install Japanese pack manually, you have to access to your server via FTP or SFTP.
-Download the package
-Unzip and upload
Unzip the compressed file and upload file ja_JP.zip into app/i18n/mageplaza/ja_JP/ja_JP.csv
-Flush cache
Follow this guide to Flush Cache on your Magento 2 store
Step 2: Create a Store View for the Language
- On the Admin sidebar, navigate to Stores>All Stores. Then tap Create Store View. and do the following:
 –Select the Store that is the parent of the view.
–Enter a Name for the store view. For example: Spanish
–Enter a Code in lowercase characters to identify the view. For example: Spanish.
-To activate the view, set Status to “Enabled.â€
–(Optional) Enter a Sort Order number to determine the sequence in which this view is listed with other views.

- When complete, tap Save Store View.
Step 3: Change the Locale of the Store View
On the Admin sidebar, tap Stores. Then under Settings, choose Configuration. In the upper-left corner, set Store View to the specific view where the configuration is to apply. When prompted to confirm scope switching, tap OK.
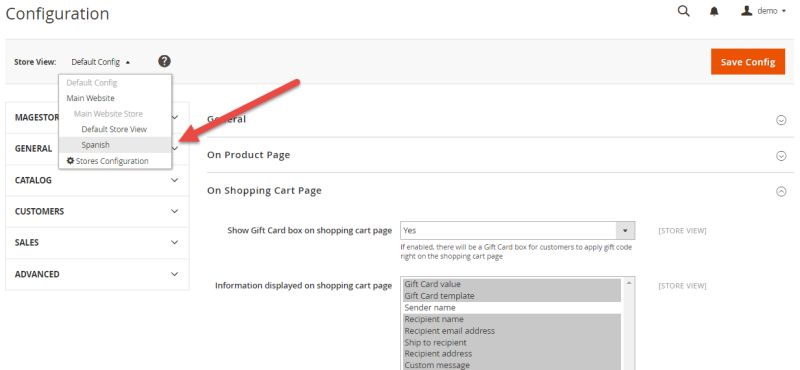
After that, expand the Locale Options section. Then, clear the Use Website checkbox after the Locale field and set Locale to the language that you want to assign to the view. If there are several variations of the language available, make sure to choose the one for the specific region or dialect. When complete, tap Save Config.
After all, please Clear Cache Via Admin System: Go to System >> Cache Management >> Enable >> Submit
Congratulation, you ‘ve finished to setup Magento 2 Language Package Translation for your store. We hope that this tutorial will help you to set your languages translation easily.
Related blogs you may be interested in:
- Top 10+ Magento 2 Reward Points Extensions
- 10+ Best Magento 2 Store Locator Extension Free & Premium
- 14+ Best Magento 2 Social Login Extension Free & Premium
- Top 9 Magento 2 Reward Points Extension Free & Premium
- Top 10 Magento 2 Blog Extension Free & Premium
- 10+ Best Magento 2 FAQ Extension Free & Premium


