


Magento 2 is the latest version of Magento, one of the leading eCommerce platforms today. Widgets, particularly the custom ones, play an important role in Magento 2, especially from a functionality standpoint. Using the Custom Widget functionality in Magento 2 allows us to create our own widget templates. A custom widget can sometimes offer an even better way of editing or adding quality content inside CMS blocks or pages.
The goal of this article is to demonstrate the way to set up widgets in Magento 2, with an emphasis on creating custom widgets.
To create custom widgets, you have to pass over 3 main stages: Module setup, Custom code, Containers.
I. Module setup
First, we need to create a new module which will require namespace and module folders. For this example, we are going to use Toptal for namespace and CustomWidget for the module name. So, let’s start as usual with composer.json, registration.php, and etc/module.xml.
app/code/Toptal/CustomWidget/composer.json
This file will be loaded by Composer every time we run it, even though we are not actually using Composer with our module.
Now we need to register our module with Magento, so we are required to create the register.php at the following location:  app/code/Toptal/CustomWidget/registration.php.
<?php
\Magento\Framework\Component\ComponentRegistrar::register(
    \Magento\Framework\Component\ComponentRegistrar::MODULE,
    'Toptal_CustomWidget',
    __DIR__
);
Now, we will create the last registration file, module.xml.
app/code/Toptal/CustomWidget/etc/module.xml
<?xml version="1.0" ?>
<config xmlns:xsi="http://www.w3.org/2001/XMLSchema-instance" xsi:noNamespaceSchemaLocation="urn:magento:framework:Module/etc/module.xsd">
	<module name="Toptal_CustomWidget" setup_version="1.0.0"/>
</config>
II. Custom code
First, we will create widget configuration which is almost identical to one used in extended widget. We do this by creating widget.xml file in etc folder.
app/code/Toptal/CustomWidget/etc/widget.xml
<?xml version="1.0" ?>
<widgets xmlns:xsi="http://www.w3.org/2001/XMLSchema-instance" xsi:noNamespaceSchemaLocation="urn:magento:module:Magento_Widget:etc/widget.xsd">
	<widget class="Toptal\CustomWidget\Block\Widget\Samplewidget" id="toptal_customwidget_samplewidget">
		<label>Toptal Sample Widget</label>
		<description></description>
		<parameters>
			<parameter name="widgettitle" sort_order="10" visible="true" xsi:type="text">
				<label>Title</label>
			</parameter>
			<parameter name="widgetcontent" sort_order="20" visible="true" xsi:type="textarea">
				<label>Content</label>
			</parameter>
		</parameters>

	</widget>
</widgets>
In the above code, we get Title and Content as parameters to be displayed wherever the widget is called. The <widget> tag contains the block class  Toptal\CustomWidget\Block\Widget\Samplewidget. This class is decelerated within Block/Widget/Samplewidget.php. The class instructs our widgets on which template to use.

Next step is to create a custom block that our widget will use.To make things easier we will extend ProductList block from Magento_CatalogWidget. This will give us all existing features of catalog product listing widget that Magento prepared for us.
We are the overriding createCollection method from ProductList to add sorting order on collection. I added “collection_sort_by†and “collection_sort_order†attribute getters with fallback on default values that are defined at the start of the class. These custom parameters are defined in widget.xmlconfiguration. Let’s see how it looks.
app/code/Toptal/CustomWidget/Block/Widget/Samplewidget.php
<?php

namespace Toptal\CustomWidget\Block\Widget;

use Magento\Framework\View\Element\Template;
use Magento\Widget\Block\BlockInterface;

class Samplewidget extends Template implements BlockInterface
{

    protected $_template = "widget/samplewidget.phtml";

}
Toptal\CustomWidget\Block\Widge\Samplewidget is declared above code. In this file, we assign a custom template file inside the $_template variable.
III. Containers
Next, we’ll see what contains our widget template.
app/code/Toptal/CustomWidget/Block/view/frontend/templates/widget/samplewidget.phtml
<?php if($block->getData('widgettitle')): ?>
	<h2 class='toptal-title'><?php echo $block->getData('widgettitle'); ?></h2>
<?php endif; ?>
<?php if($block->getData('widgetcontent')): ?>
	<h2 class='toptal-content'><?php echo $block->getData('widgetcontent'); ?></h2>
<?php endif; ?>
Here, we can see how to pick up the value from widget parameters. It’s simple:
$this->getData(‘widgettitle’);
and
$this->getData(‘widgetcontent’);
What is our end-result? Let me show you what it looks like in Magento Admin:

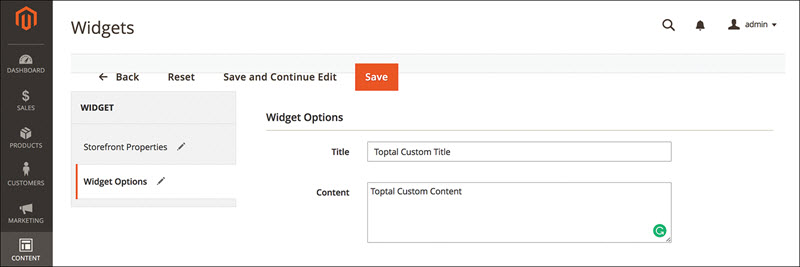
Now we have to save this widget and flush the cache. As outlined previously, this can be done from admin or the command line, using php bin/magento cache:clean and php bin/magento cache:flushƯ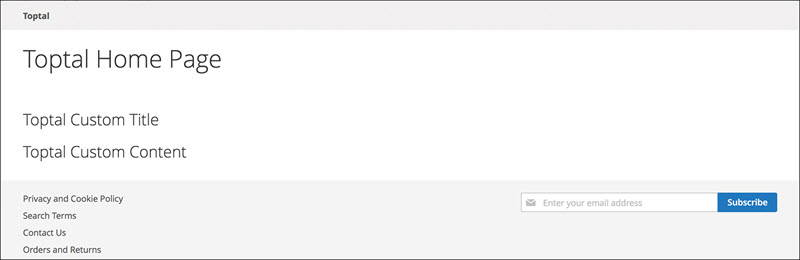
If you have any question, please comment below.
Related Blogposts You May Be Interested In:
- Top 10+ Magento 2 Reward Points Extensions
- 10+ Best Magento 2 Store Locator Extension Free & Premium
- 14+ Best Magento 2 Social Login Extension Free & Premium
- Top 9 Magento 2 Reward Points Extension Free & Premium
- Top 10 Magento 2 Blog Extension Free & Premium
- 10+ Best Magento 2 FAQ Extension Free & Premium

