


In this tutorial, we will help you to explore the way to work with Magento 2 attributes. This includes how to create and delete Magento 2 attributes as well as attribute sets. In addition, you will find out ways to import and export CSV file, and add 2 types of attribute: EAV and extension.
Table of Contents
1. Create / Delete an attribute
Magento 2 attributes are predefined elements such as Name, Price, Description, and so on, which can be used for any products. Thus, they play an essential role in your store catalog which is to help your customers easily pick out what they need.
1.1 Add Magento 2 attribute
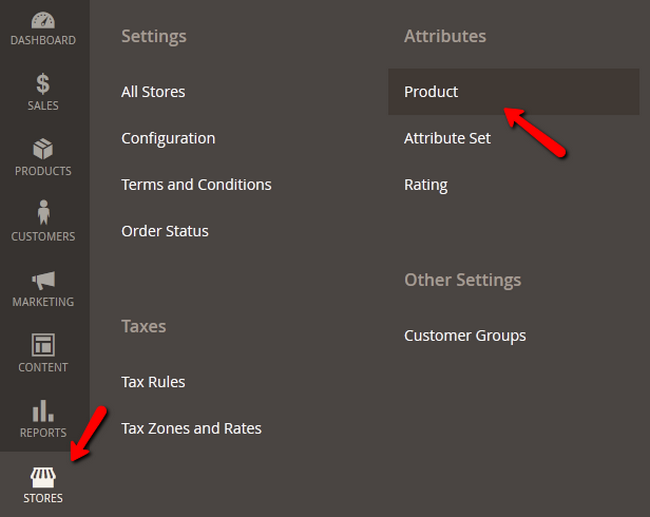
First, log in to your website’s Admin panel.
In Dashboard, navigate to Store Tab -> Select Product-> Click on the button Add New Attribute.
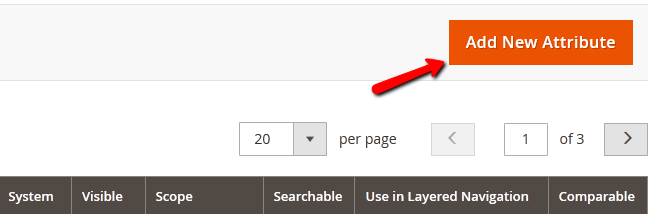
In the new page, all your Magento 2 attributes will be displayed. To add a new one, click “Add New Attribute†button in the upright corner.
Now, you can start customizing your attribute.
Step 1: Properties Section
In the ATTRIBUTE INFORMATION box, click on Properties, then customize the blank fills.
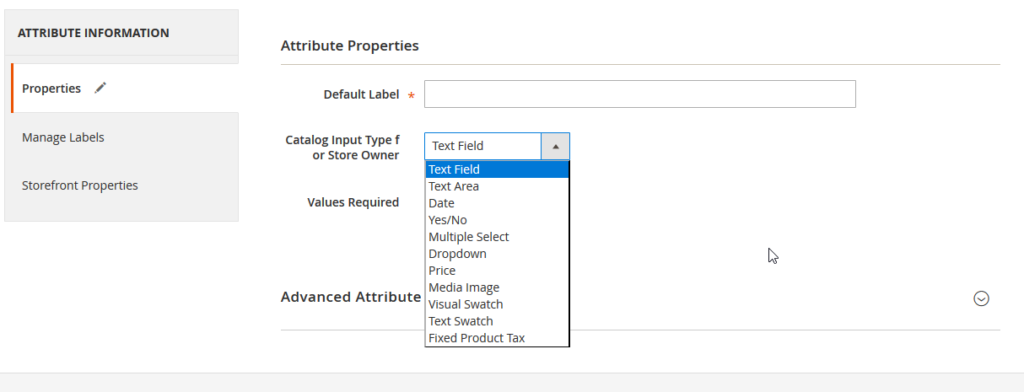
- Default label: the name of the attribute you want to create such as Size, Height, Color,…
- Catalog Input Type for Sore Owner: Depend on what kind of your attribute is, choose the suitable input method.
- Values Required: set to “Yes†if you want to apply this values for all your products and vice versa.
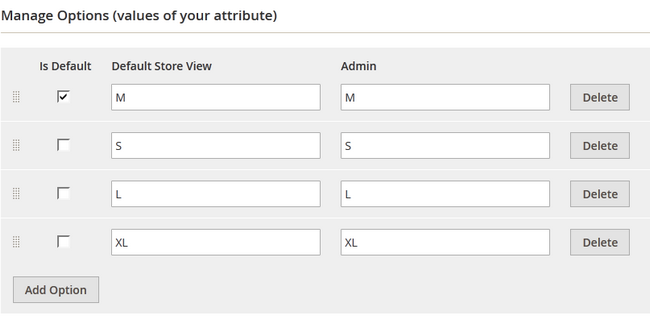
After configuring the Size attribute as the picture above you will get this.
Next, customize your attribute in Advance Attribute Properties section in the page bottom.
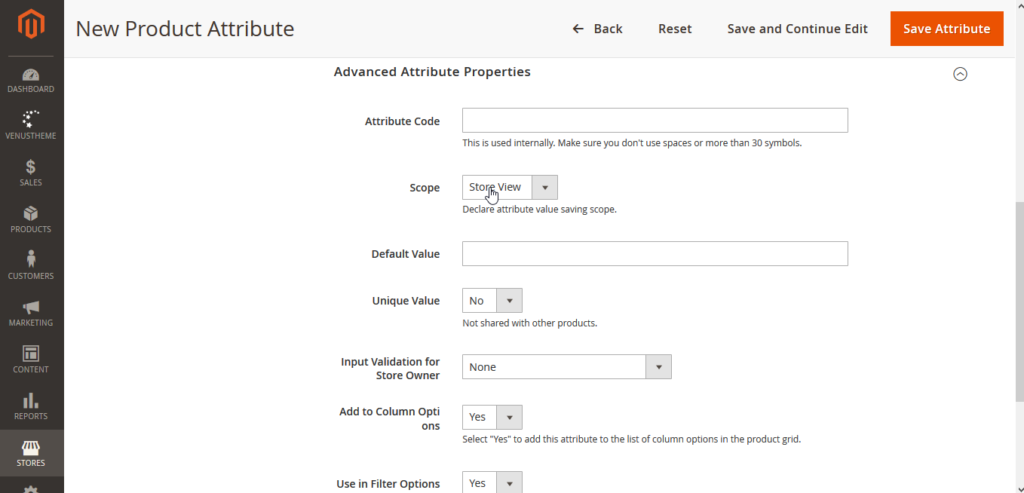
- Attribute Code: The name of the attribute that will be used by the system.
- Scope: Select to apply your attribute properties to Global, Website, Store, or Store view. To illustrate, this is the overview of the extent to which your option will affect.

- Store View: applied only to current store view and different in all websites and all Store Views
- Store: applied to current store and all store views
- Website: applied to all stores under the same website but different from websites to websites
- Global: applied for all websites and stores
- Default Value: Enter the suitable value if your different products are made of the same material or share the same features.
- Unique Value: Set to Yes to make this attribute unique for each product and vice versa.
- Input Validation for Store Owner: To validate the data entered in the text field, choose options offered in the dropdown menu. For example, if you choose “Text Field”, only letters are allowed, otherwise, we will be given an error.
- Add to Column Options: If you want this attribute to be visible in the admin’s panel table in the backend, set to Yes.
- Use in Filter Options: If you want to add this attribute to the list of filter options, set this to Yes.
Step 2: Manage Labels section
Navigate to the ATTRIBUTE INFORMATION box again and click on Manage Labels, then you will get this page.
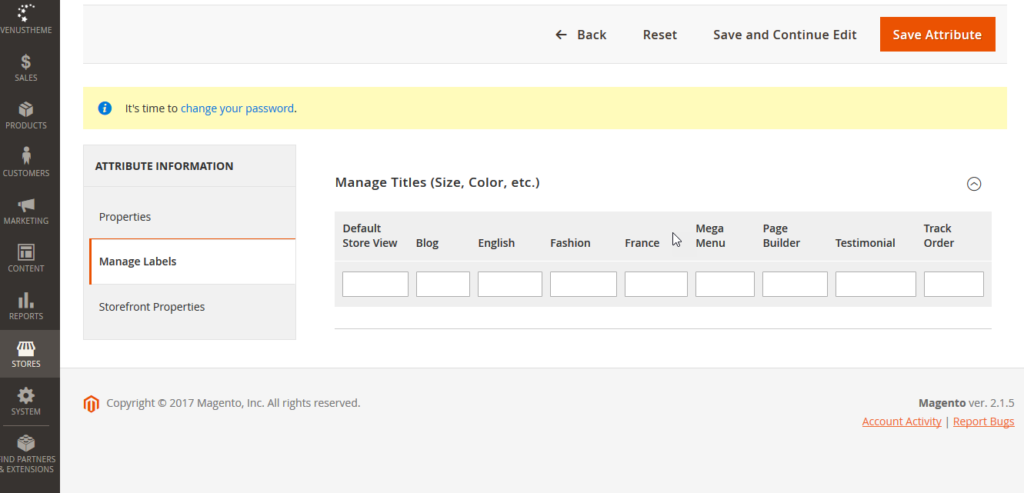
Default Store View: The attribute label shown to the customer in the frontend
In case your store is available in several languages, fill in a translated title of an attribute for each store view in this section.
Step 3: Storefront Properties section
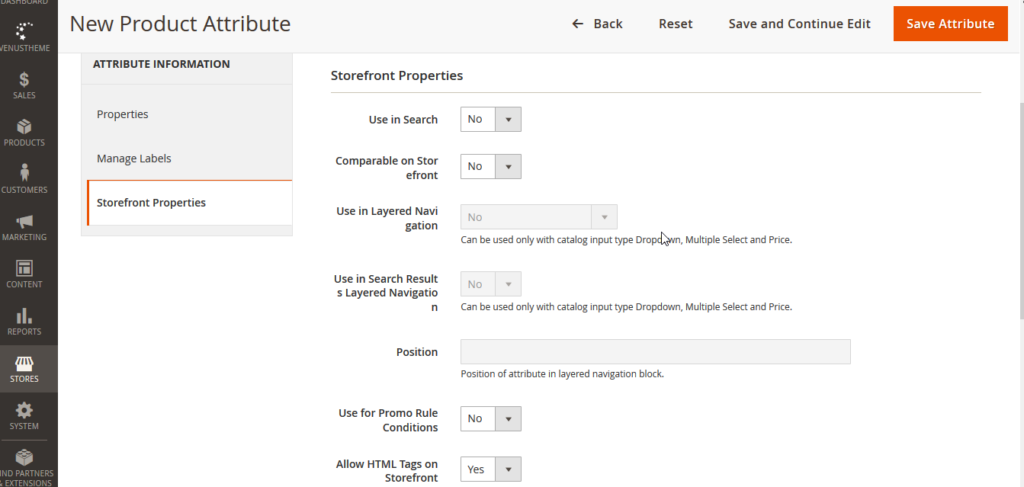
- Use in Search: select Yes to make this attribute available for searching.
- Comparable on Storefront: select Yes to include the attribute in Product Compare.
- Use in Layered navigation: select Yes to use the attribute as the filter in layered navigation. However, you can only use this feature in dropdown, multiselect, and price input
- Use in Search Results Layered Navigation: select Yes to use the attribute in the filter in layered navigation on search result pages.
- Position: enter the number to determine the relative position of the attribute in the layered navigation block. The one with the lowest number will be displayed on top.
- Use for Promo Rule Conditions: select Yes if you want to run any kinds of promotions that include the value of this attribute.
- Allow HTML Tags on Frontend: select Yes to allow the text to be formatted with HTML tags.
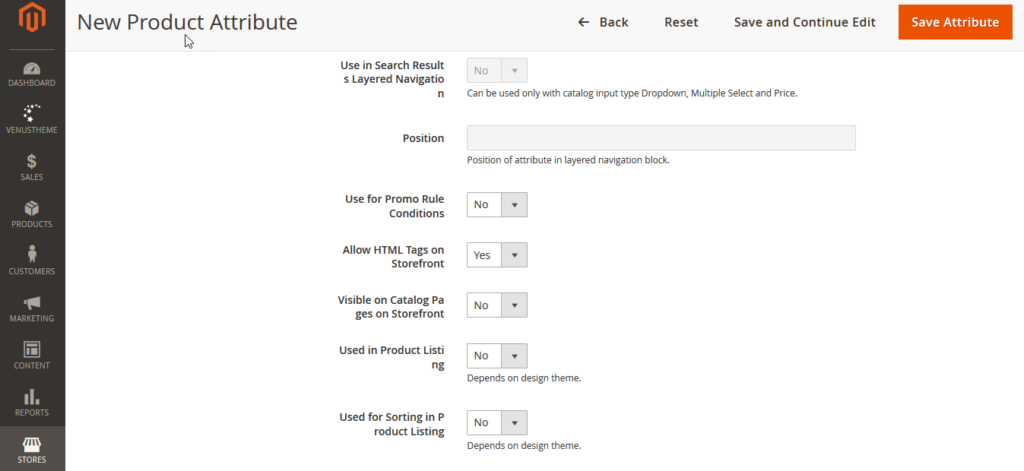
- Visible on Catalog Pages on Storefront: select Yes to include the information for this attribute on the products’ additional information tab.
- Used in Product Listing: select Yes to include the attribute in catalog page listings.
- Used for Sorting in Product Listing: select Yes to use attributes as a sort parameter for product listings.
Finally, click Save Attribute to save all the procedure.
1.2 Delete Attribute
After creating Magento 2 attributes, go to STORES -> Products, you will see a list of attributes. Now, click to the one you want to delete.
Then, you will be lead to the edit page of that attribute. There’s Delete Attribute option in the toolbar. Click on it and you’re done.
2. Create Magento 2 attributes set
An attribute set is a list of attributes which show all the characteristics of a product. It serves as a template for a new product. Thus, assigning a product to a specific attribute set are helpful in many aspects:
- Classifying the products.
- Gathering all the product traits in a single place
- Importing the required information about a product easier
To create an attribute set, you need:
Step 1: Log in to the Admin Panel.
Step 2: In the Admin Panel, navigate to Store.
Step 3: Then, in the opened box, click on Attribute Set.
Step 4: Next, the new page, click on Add Attribute Set, then start customizing.
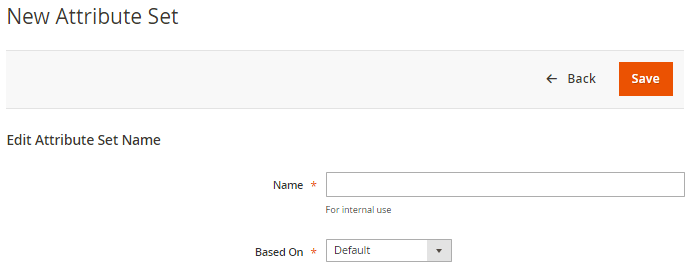
Enter Name of your new attribute.
In the Base On dropdown menu, if you are creating your very first attribute set, there will be only Default option. However, if you’ve already have other attribute sets, this new one will be a kind of sub attribute for the one you choose.

3.  Import and Export Magento 2 Attributes via CSV file
3.1 Import CSV file
You’ve got the gist of what you can do to create new products and Magento 2 attributes. Yet, if you have a huge number of products, the manual way of creating one by one doesn’t seem to be a good choice. With that being said, here’s the shortcut for you – to import CVS file.
In Dashboard, go to System.
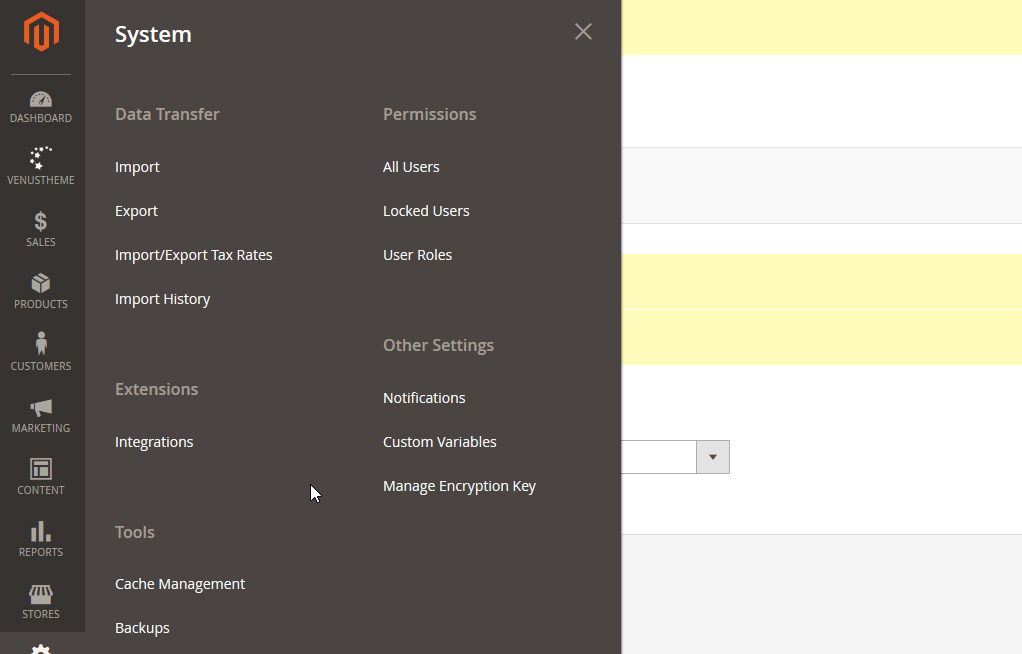
In the opened box, click Import.
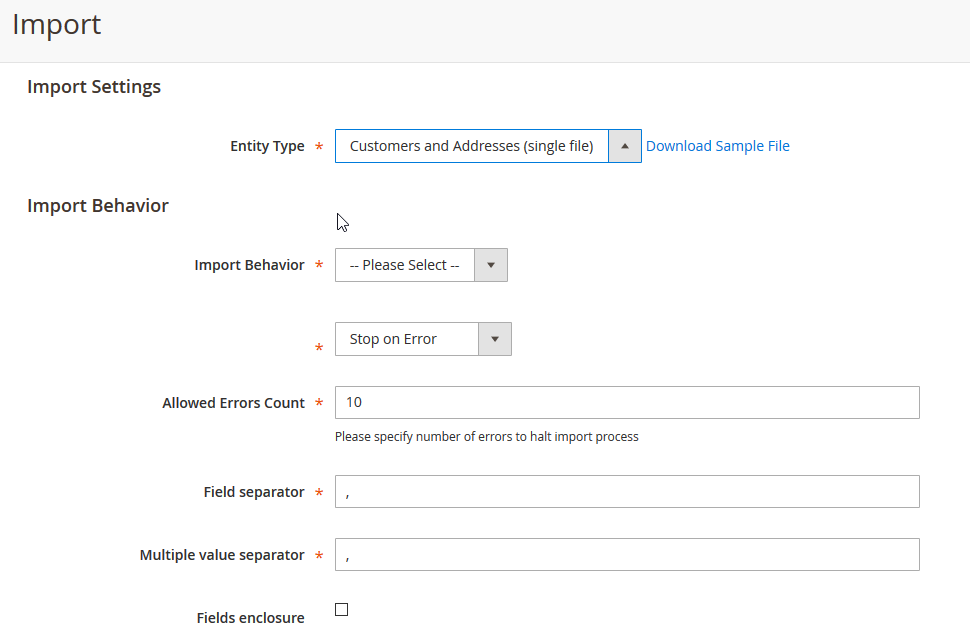
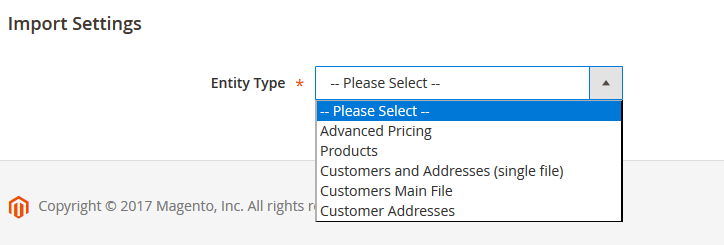 After selecting what type you want to import from Entiy Type dropdown in Import Setting, you will get to this.
CSV file
In case you want to know what CSV file will be look like, Download Sample File to check it out. Here is the sample file.

Now, you can input as many products as you want.
Next, upload your product images.
Especially, make sure your CSV file includes the following rows:
Base_image
Base_image_label
Thumbnail_image
Thumbnail_image_label
Small_image
Small_image_label
Then, upload all the images of the product in your Magento 2 pub/media/import folder. The images’ names in the folder and in CSV file must be the same.
In the end, your CSV file will be like this.

Now, back to the import page.
In the Import Behavior section, set the Import Behavior’s dropdown to Add / Update
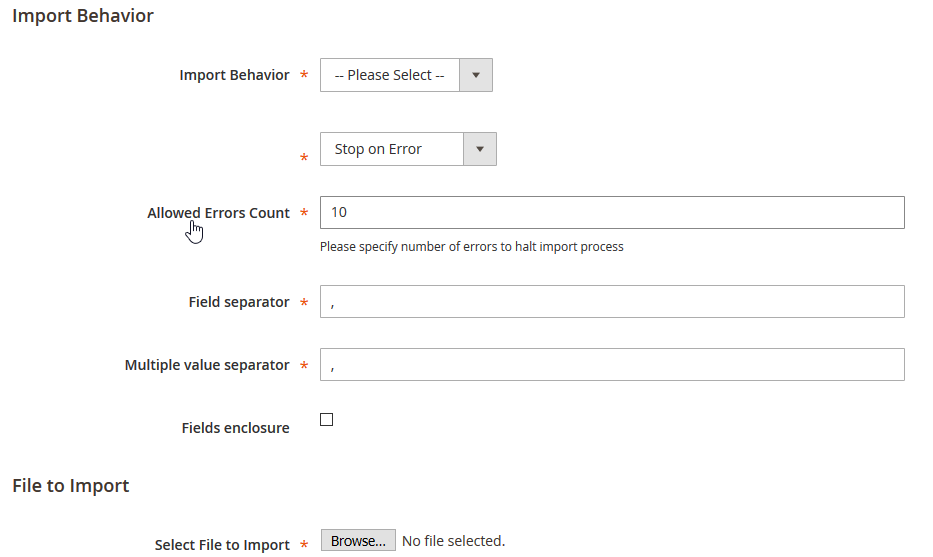
In File to Import section, click Browse and select CSV file form your computer.
Next, enter /pub/media/import in Image File Directory.
Then, click Check Data button in the upright corner.
If successful, you will get this message.

Click Import.
Now, you can check your work by navigating to PRODUCTS -> Catalog.
3.2 Export CSV file
In Dashboard, click Settings -> Export.
Now, in the Export Settings section, choose Products in the Entity Type’s dropdown menu.
Next, set Export File Format to CSV.
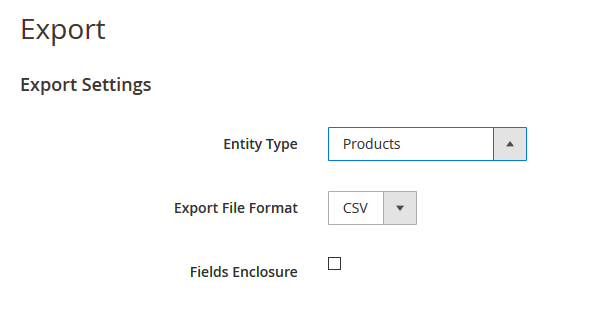
Then, you will see the Entity Attributes section displayed.
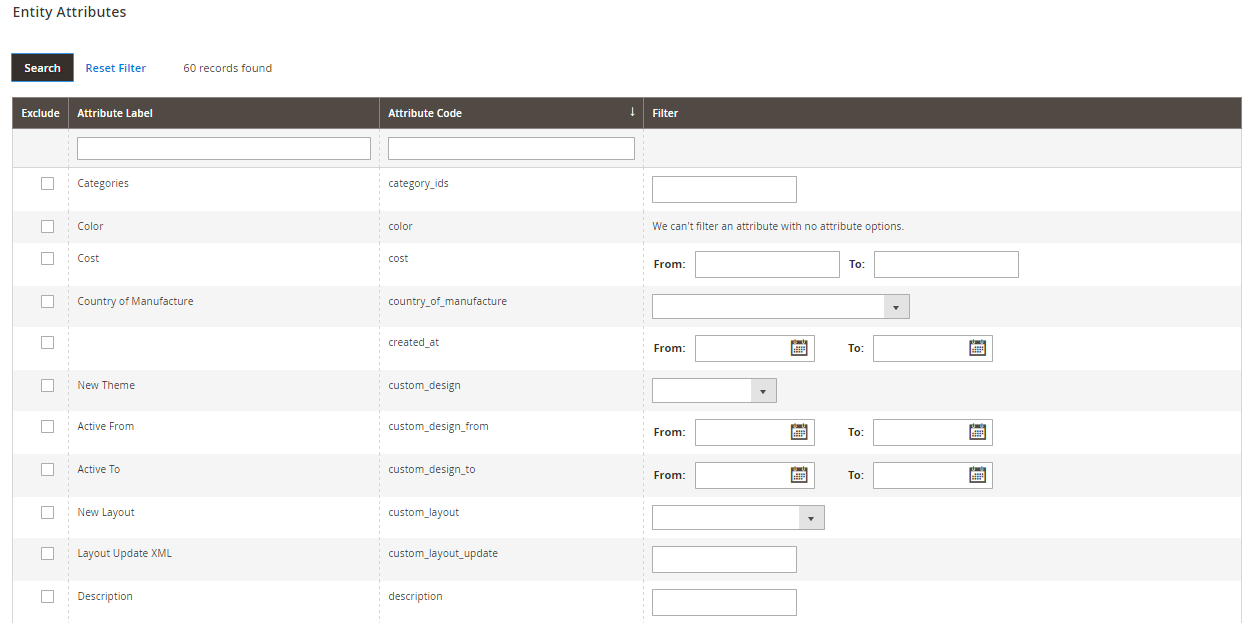
Exclude the unnecessary attributes from the list by selecting them and then click on Continue from the bottom of the page, then you’re done.
4. Create EAV attribute and Extension attribute
4.1 Add EAV attributes
First, create eavsetup factory.
Next, run the following script and complete the creating EavSetup factory.
/**
* @var EavSetupFactory
*/
protected $eavSetupFactory;

/**
* UpgradeData constructor
*
* @param EavSetupFactory $eavSetupFactory
*/
public function __construct(EavSetupFactory $eavSetupFactory)
{
   $this->eavSetupFactory = $eavSetupFactory;

}
Next, add EAV attribute.
/** @var EavSetup $eavSetup */
   $eavSetup = $this->eavSetupFactory->create(['setup' => $setup]);
   /**
   * Add attributes to the eav/attribute
   */

   $eavSetup->addAttribute(
     \Magento\Catalog\Model\Product::ENTITY,
     'is_featured',
      [
        'group' => 'General',
        'type' => 'int',
        'backend' => '',
        'frontend' => '',
        'label' => 'Is Featured',
        'input' => 'boolean',
        'class' => '',
        'source' => 'Magento\Eav\Model\Entity\Attribute\Source\Boolean',
        'global' => \Magento\Eav\Model\Entity\Attribute\ScopedAttributeInterface::SCOPE_GLOBAL,
        'visible' => true,
        'required' => false,
        'user_defined' => false,
        'default' => '1',
        'searchable' => false,
        'filterable' => false,
        'comparable' => false,
        'visible_on_front' => false,
        'used_in_product_listing' => false,
        'unique' => false,
        'apply_to' => ''
      ]
        );
- is_featured: attribute code
- group: group name for attribute that will display in backend
- type: data type saved in database
- global: the scope of attribute (store, website or global)
- visible_on_frontend: true or false that allow the attribute is displayed on frontend or no
- apply_to: product type that you want to add attribute
 Remove an EAV attribute
$entityTypeId = 4; // Find these in the eav_entity_type table
$eavSetup->removeAttribute($entityTypeId, 'is_featured');Â 4.2 Create extension attributes
First, create app/code/landofcoder/DemoModule/etc/extension_attributes.xml.
Next, clear the var/generation when you run setup:di:compile command.
Now, you can set these Magento 2 attributes value by creating the instance of Magento/Checkout/Api/Data/ShippingInformationInterface.php interface.
$objectManager = \Magento\Framework\App\ObjectManager::getInstance();
$addressInformation = $objectManager->create('Magento\Checkout\Api\Data\ShippingInformationInterface');
$extAttributes = $addressInformation->getExtensionAttributes();
$selectedShipping = $extAttributes->getCustomShippingCharge(); //get custom attribute data.
Hope that this tutorial will help you get the basis of Magento 2 attributes. You can feel free to leave any comments in the Comment Section below. If you find this tutorial useful to you, do not forget to Save and Share with others. Thank you!
More Magento 2 tutorials to check out
The Ultimate Magento 2 Extension Tutorials
How to Create and Move Magento 2 Block
How to uninstall Magento 2 Extension


Great Work! Attribute are used for multiple purposes in Magento. There’s a very easy to follow guide for creating an attribute and attribute set programmatically in Magento on magenticians. I found it very easy to understand, I hope it helps others too. thanks
Comments are closed.