As you may know, uploading your own logo is necessary for any business. Logo not only increases your brand awareness but it also makes the store more professional and more reliable
In this tutorials, I will show you “How to change Logo Magento 2” that appear on:
- frontend
- email templates
- PDF invoices
The process of changing logo requires simple steps. Before your site is ready to launch, you can change it in the development process.
Table of Contents
I. UPLOADING YOUR MAGENTO 2 LOGO
Before uploading your logo please notice that the size and location of the logo are determined by theme.
Moreover, your logo could be saved as GIF, PNG, JPG, or SVG file type. The default logo is saved as an SVG file.
In order to access logo image location on the server. Please follow the path:
Path: app/design/frontend/[vendor]/[theme]/web/images/logo.svg
Any image file with the name in that location are used as a logo.
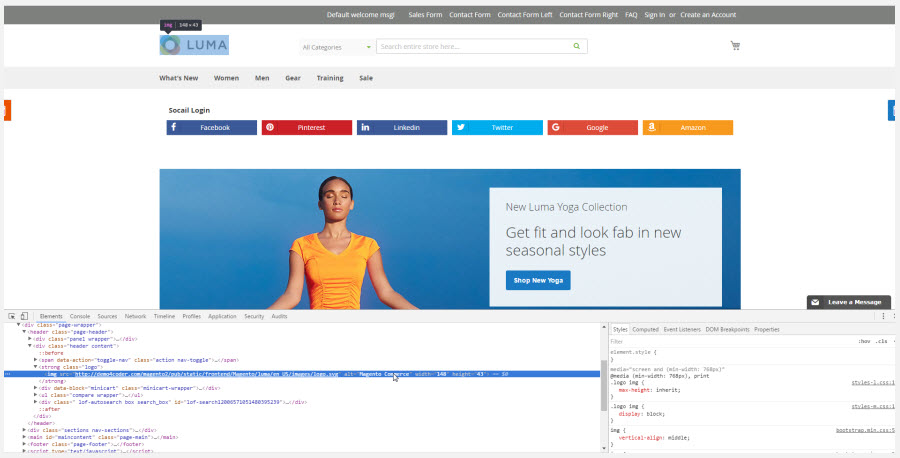
To know the logo size, right click on the logo image and inspect the element as the following image.

Moreover, the logo that is used in the header also appears on email templates and on PDF invoices and other sales documents.
However, the logos used for email templates and invoices requires a different size that should be uploaded separately.
II. HOW TO UPLOAD FRONTEND LOGO MAGENTO 2
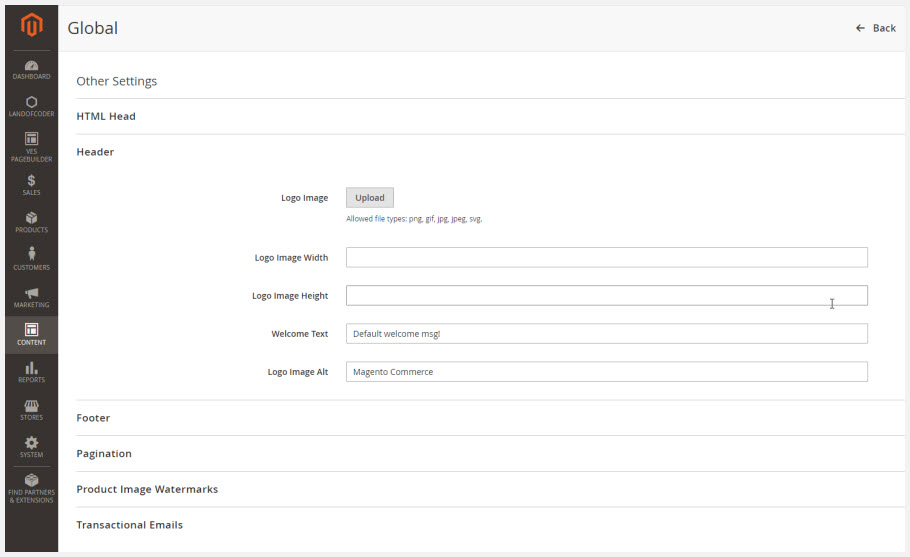
On the admin panel, please go to Content > Design > Configuration > Choose desired store > Header tab.
Then open Header Section like below image.

In order to upload your new logo, click on Choose File. Then, upload the file from your computer.
Enter the Logo Image Width and Logo Image Height.
In the Logo Image Alt section, insert the text that you want
After completing please do NOT forget to click Save Config
III. HOW TO CHANGE EMAIL LOGO IN MAGENTO 2
Email Logo is one of the best ways for the audience to identify your brand easily and at same time, your store becomes more reliable to the visitor. Therefore, right after installing Magento 2 successfully, the first of all is replacing the Magento 2 Defaul Logo by your own logo.

Here are TWO big steps that help you change email logo in Magento 2:
Step 1: Change email logo.
- On the Admin Panel, Content ⇒ Design ⇒ Configuration.
- You can see the existing design configuration on the management table, then click on Edit under Action.
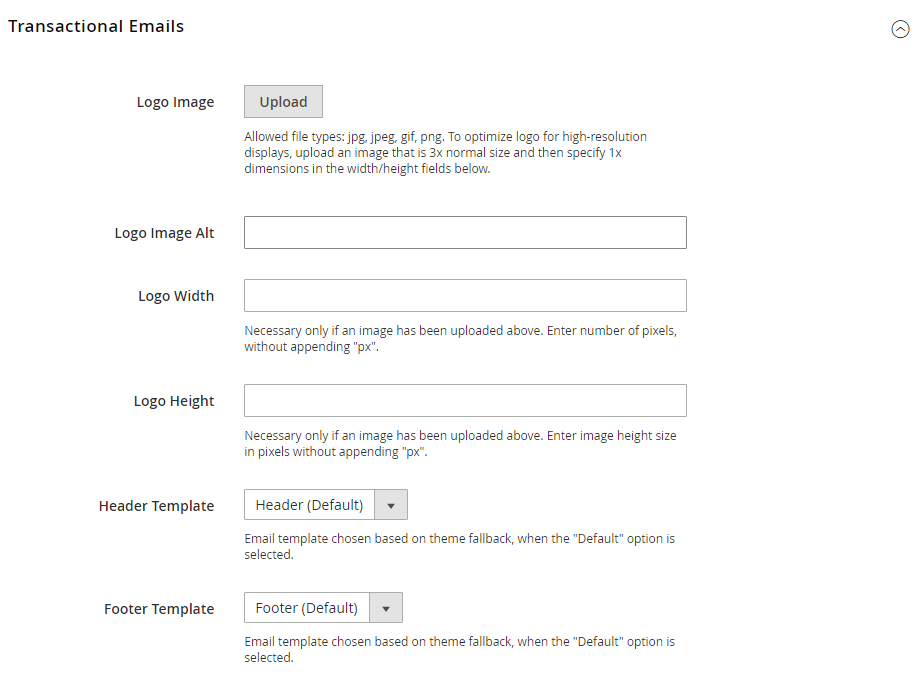
- On the workplace, please scroll down to Other Settings, open Transactional Email section,
- To change your Logo Email, click on Upload to choose one of the image file you want to aplly for your logo.
- Enter the alternate text identify the Logo Image Alt.
- Require Logo Width and Logo Height in pixels. Just enter the number that don’t include “px†symbol. The appearance of the email logo in the header depends on the offered value size instead of the real size of the logo.
Step 2: Select the Header and Footer template
If you want to modify Header and Footer templates or have multiple stores, you can assign a specific template to each, that will appear on the transactional email message.
- Select the Header template and Footer Template from the available list as needed.
- Save Config to finish and the design of the email is active.
IV. HOW TO CHANGE LOGO ON PDF INVOICES IN MAGENTO 2
If your store has its own logo, you would probably want to add it to each invoice that you print for your customers after they make a purchase.
Open the admin panel of your Magento 2 installation.
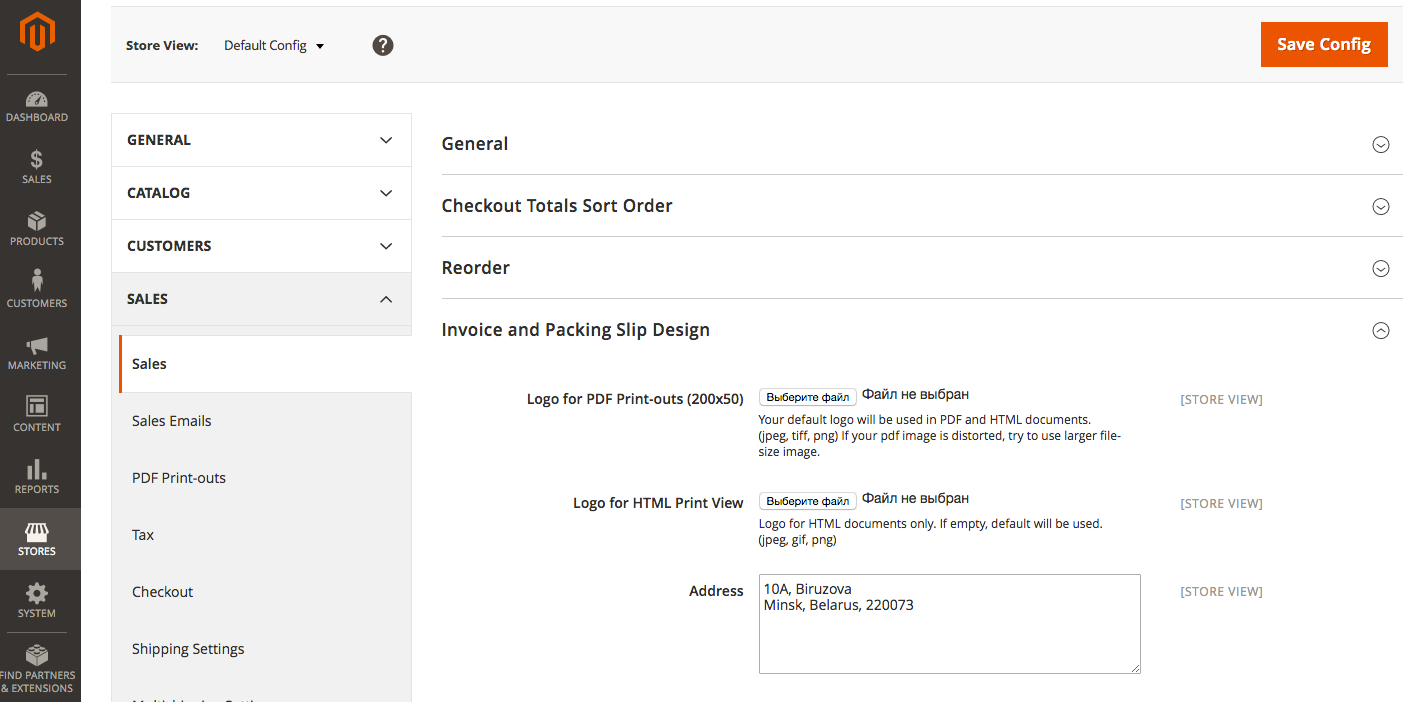
Navigate to Stores => Configuration
Then open the Sales section by clicking on it and find a sub-section with the same name.
Sales => Sales
Find a tab called “Invoice and Packing Slip Design†and click to open it. Here you can upload your logo and add company address.

Remember to Click Save Config to apply the changes.
Magento 2 Extensions You May Be Interested In


![[SALE OFF] Discount 30% All Premium Extensions On Christmas And New Year 2025 christmas-and-new-year-2025](https://landofcoder.b-cdn.net/wp-content/uploads/2024/12/christmas-and-new-year-2025-1-218x150.png)


